
When I scout from home, I am not trying to prove that a mature buck is bedding on one exact pin. I am trying to narrow hundreds or thousands of acres into a short list of places that deserve my time on the ground.
That is the real value of maps and hunting apps. They help you find terrain, cover, access, and pressure features that could give a buck the security he needs. Then you use field sign, observations, wind, thermals, and historical knowledge to decide whether the location is real and huntable.
The Short Answer
Start with topographic terrain, add aerial imagery and cover, check wind and access, and use advanced layers such as LiDAR or leaf-off imagery when they are available. Rank each possible bedding location as Yes, Maybe, or No. Then verify the best candidates carefully in the field. A map pin is a bedding candidate—not a confirmed buck bed.
What Maps Can—and Cannot—Tell You About Buck Bedding
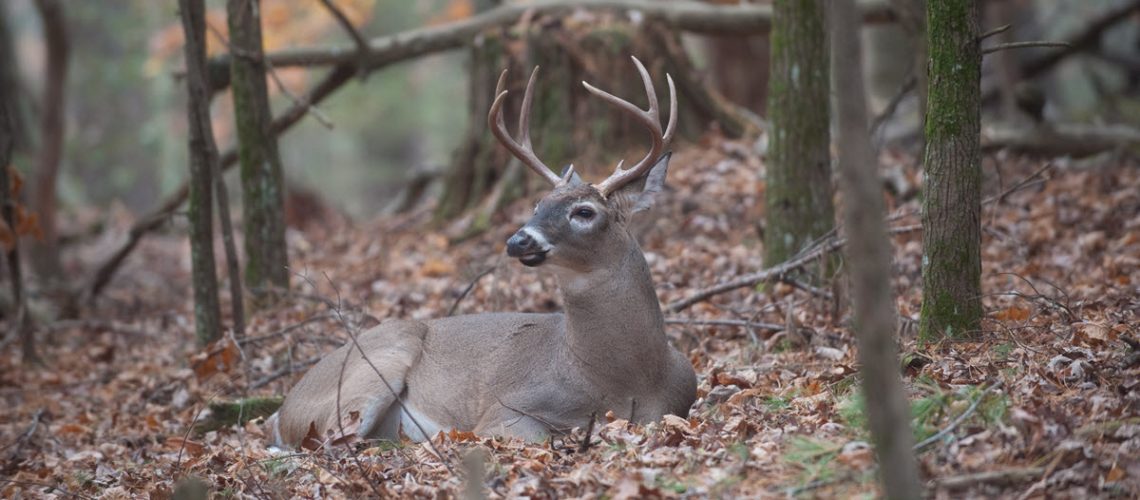
A mature buck does not choose a bed because a contour line looks good to us. He chooses a location that gives him some combination of security, wind advantage, visibility, sound, escape routes, and low human pressure. Food, water, doe bedding, seasonal movement, and the time of year can also change which bed he uses.
Maps help us see where those advantages may come together. They do not show whether the bed is active today, whether another hunter is already using the access route, or whether the wind behaves the way the forecast says it should. That is why digital scouting is the first filter in the process, not the final answer.
Field Check: Is the Cover Actually Thick Enough?
A satellite image can show young growth, a clear-cut, a swamp edge, or a dark patch of timber. It cannot tell you how much of a deer that cover hides at ground level.
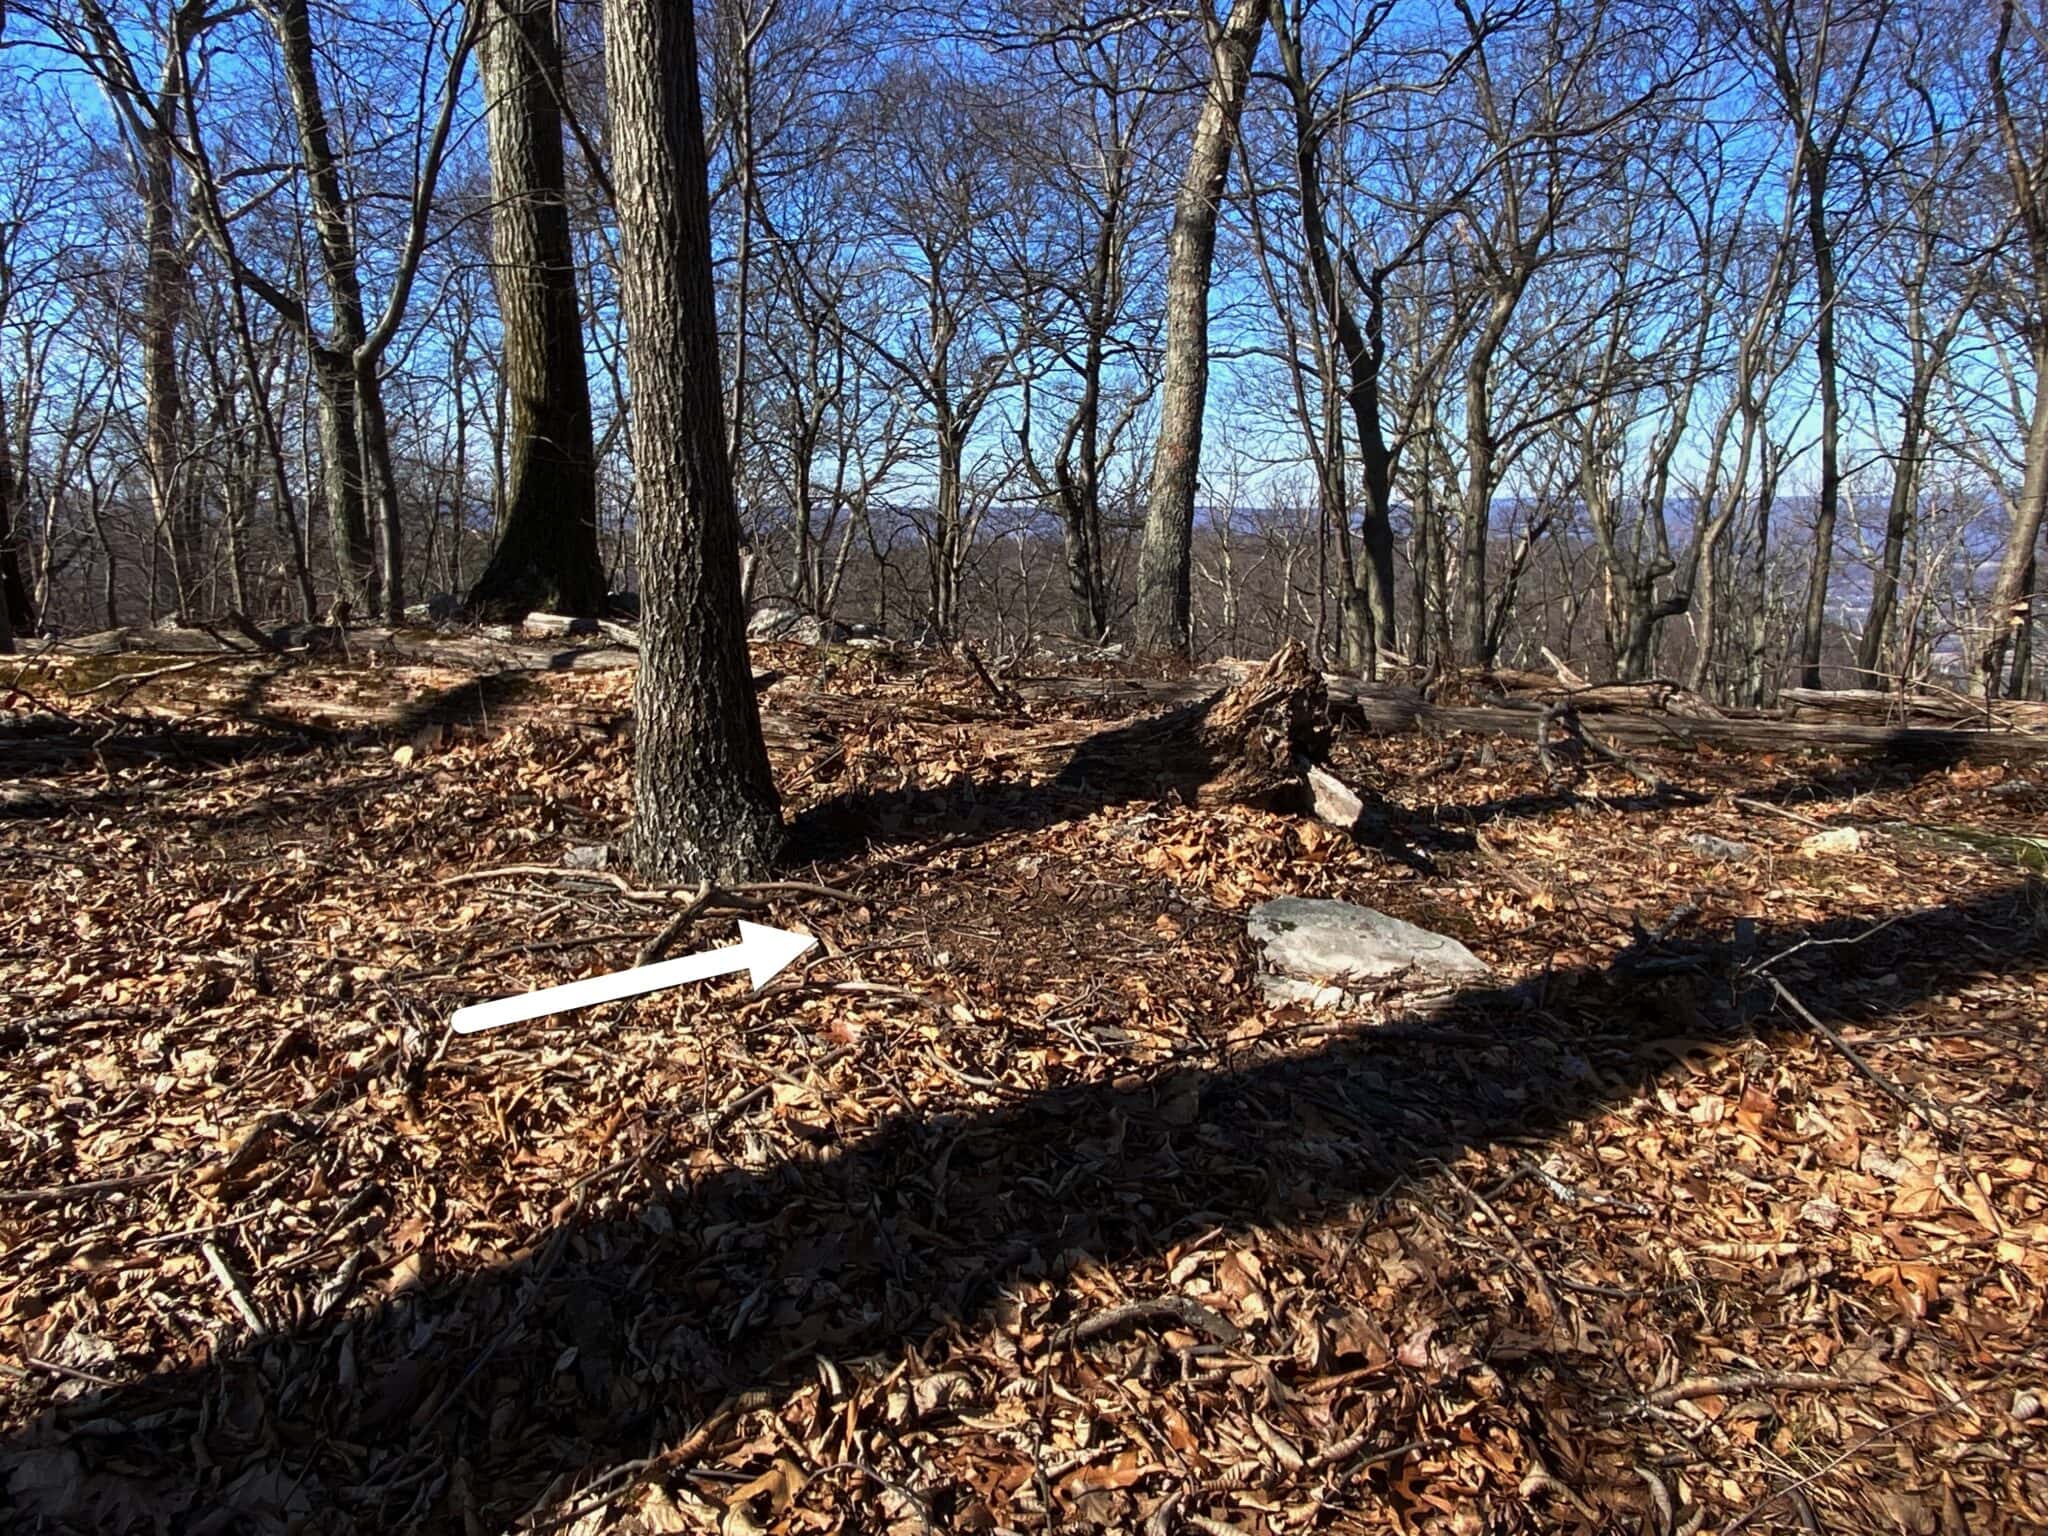
Penn State’s Deer-Forest Study defines security cover as vegetation thick enough to hide about 90% of a deer from 200 feet or less. Use that as a simple field check. Stop at the edge, stay on a safe wind, and look through the cover at deer height. If you can see straight through it, the terrain may look right while the cover is wrong.
That still does not confirm a mature-buck bed. It only tells you the location has one important ingredient. Tracks, beds, hair, rubs, escape routes, wind, pressure, and current use finish the picture.
If you are new to bedding behavior, start with Buck Bedding 101. For the complete behavior and hunting guide, read Where Bucks Bed and How to Hunt Them Without Blowing It. This guide stays focused on the digital side: how to find and rank likely bedding from maps and apps.
My Digital Scouting Workflow for Buck Bedding
I work through the map in layers. Each layer either strengthens a bedding candidate or gives me a reason to move on. I would rather finish with five strong candidates than fifty pins I cannot explain.
1. Start With the Topographic Map
Topo maps show the shape of the ground. In hill and mountain country, I look first at ridge points, benches, knobs, saddles, side-hill shelves, upper-third transitions, and the ends of spurs. These features can let a buck use wind from one direction, rising or falling thermals from another, and his eyes and ears to cover the rest.
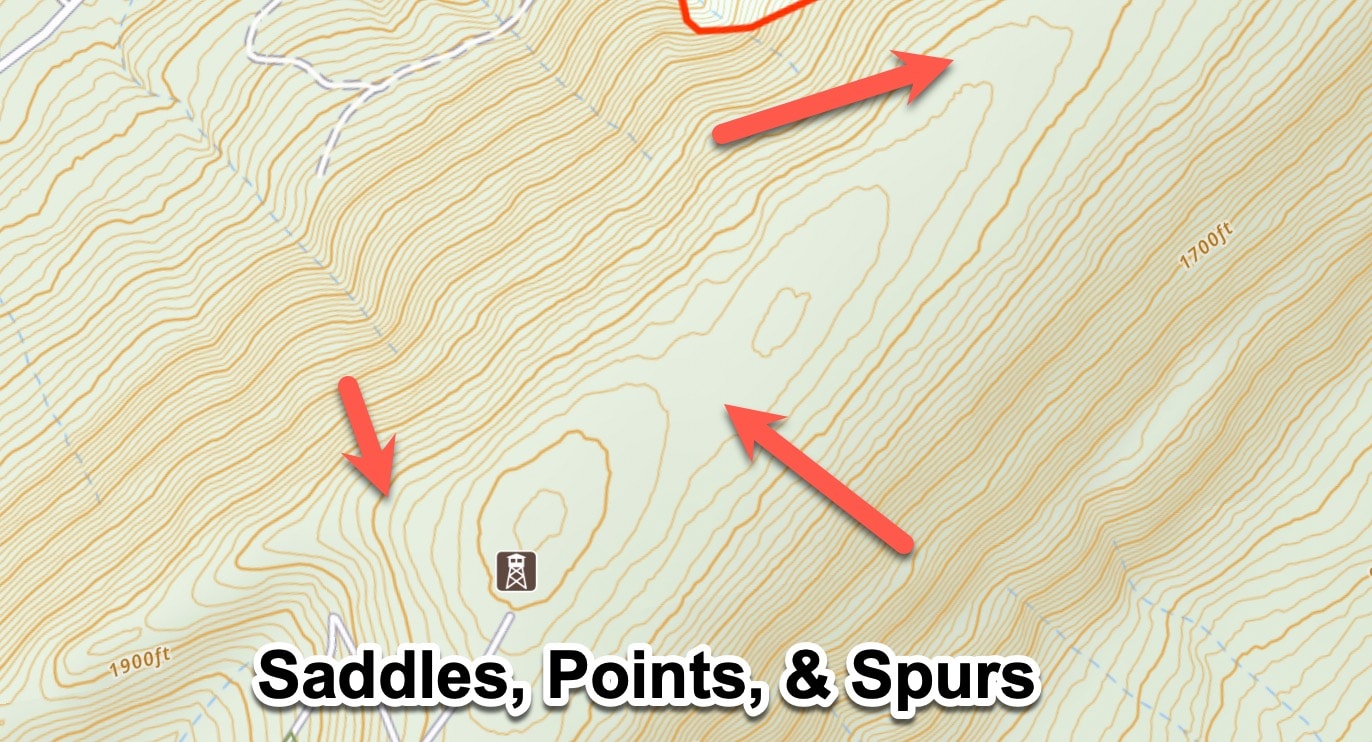
Do not lock yourself into the idea that every buck beds with the wind in his face or always at his back. Real bedding is more complicated. A buck may position himself where the wind covers the direction he cannot see, where thermals pull scent from below, or where shifting air gives him information from several directions. He may also use a network of beds as conditions change.
Flat country requires a different eye. Small rises, ditch banks, creek bends, islands in wetlands, old logging roads, levees, oxbows, and subtle high spots may matter more than dramatic contour lines. LiDAR and shaded-relief layers can expose changes that a standard topo map barely shows.
If contour lines are still confusing, use my guide to reading topographic maps for deer hunting before trying to identify bedding.
2. Add Aerial or Hybrid Imagery
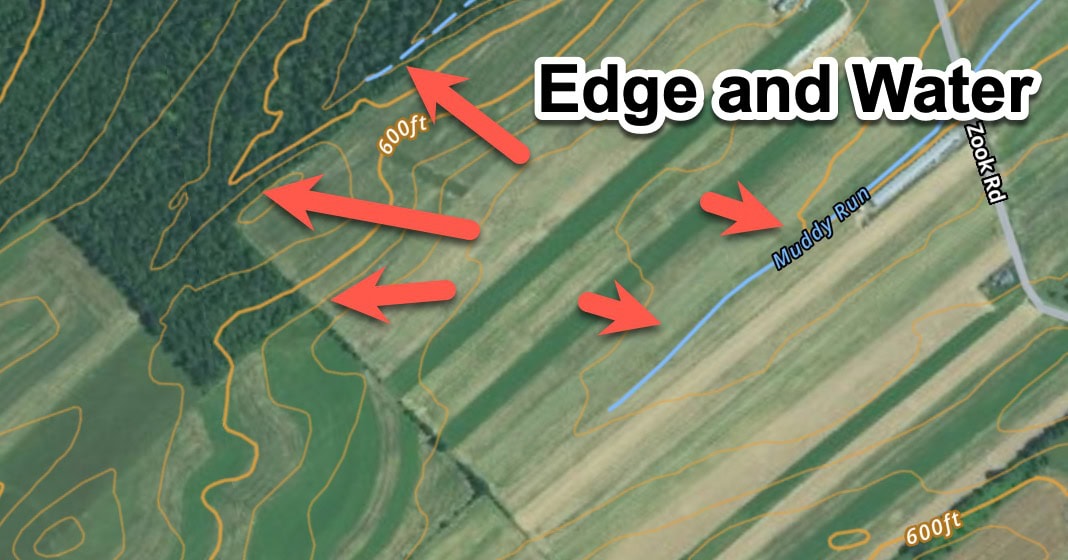
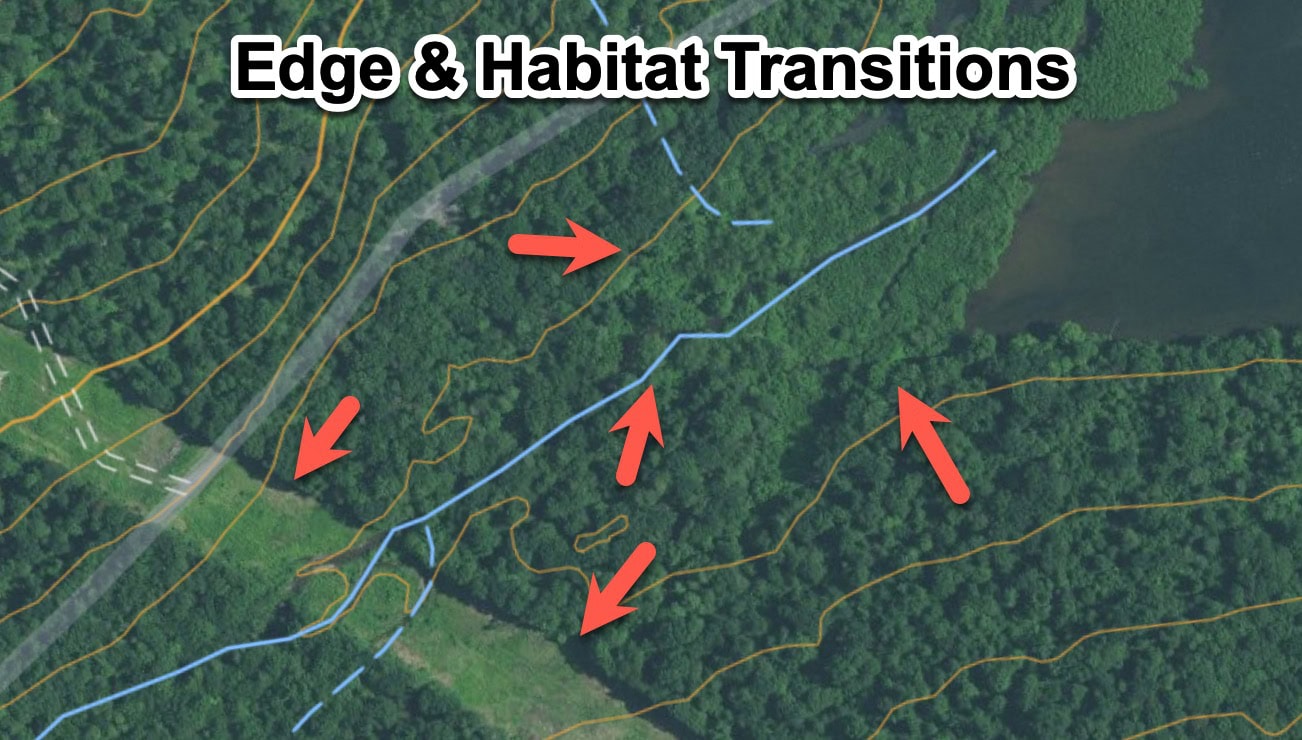
Once I have terrain candidates, I switch to aerial imagery or a hybrid layer. Now I am looking for security cover and habitat changes that support the terrain.
- Thick regrowth beside mature timber
- Clear-cuts, burns, storm damage, and logging edges
- Conifer pockets inside hardwoods
- Marsh islands, cattail edges, and dry-ground transitions
- Creek bends, oxbows, steep banks, and hard-to-cross water
- Cover near seasonal food or doe bedding
- Places that sit just beyond easy hunter access
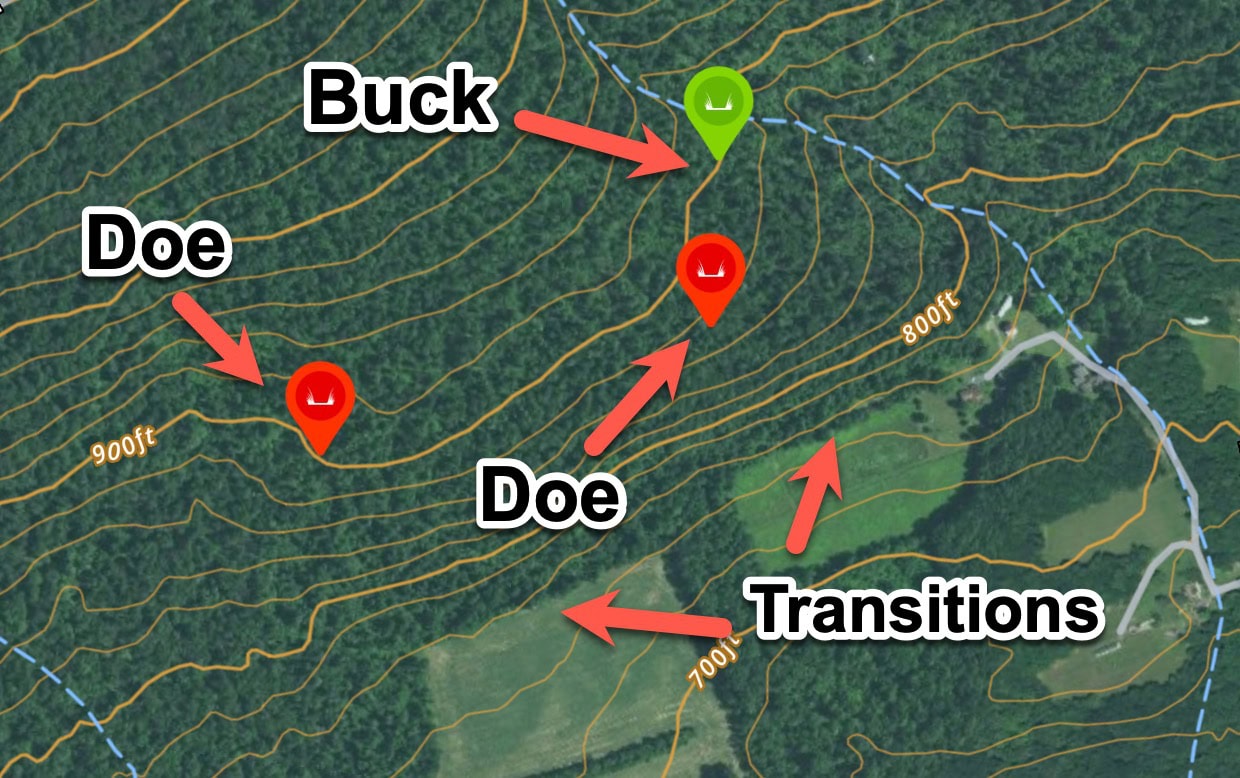
A river crossing or deer trail is not automatically a bedding location. It may only show travel. I want to know what nearby feature gives a buck a reason to stop and spend daylight there. The bedding candidate should make sense as a secure place, not just a place deer pass through.
3. Use Advanced Map Layers When They Add Value
Modern hunting apps can show much more than a basic topo and satellite view. The exact features depend on the app, plan, and location, but these are the layers I would look for:
- LiDAR or shaded relief: exposes benches, old roads, ditches, cuts, and small rises hidden by tree cover.
- Leaf-off imagery: makes trails, edge cover, timber changes, and ground structure easier to see.
- Recent imagery: helps identify fresh logging, storm damage, new access, burns, or cover changes.
- 3D terrain: helps beginners understand how points, bowls, drainages, and access routes connect.
- Slope, aspect, and elevation: help compare steepness, sun exposure, thermal behavior, and seasonal cover.
- Property and public-access layers: keep your scouting organized around legal access and realistic entry routes.
- Offline maps, waypoints, tracks, notes, and photos: preserve what you learn when service disappears in the field.
I use features before brand names. onX, HuntStand, Spartan Forge, and other hunting or mapping apps continue to change. Pick the app that gives you the layers, offline access, and field notes you will actually use. The most expensive layer does not help if you cannot explain what it shows.
4. Study Access, Wind, Thermals, and Pressure
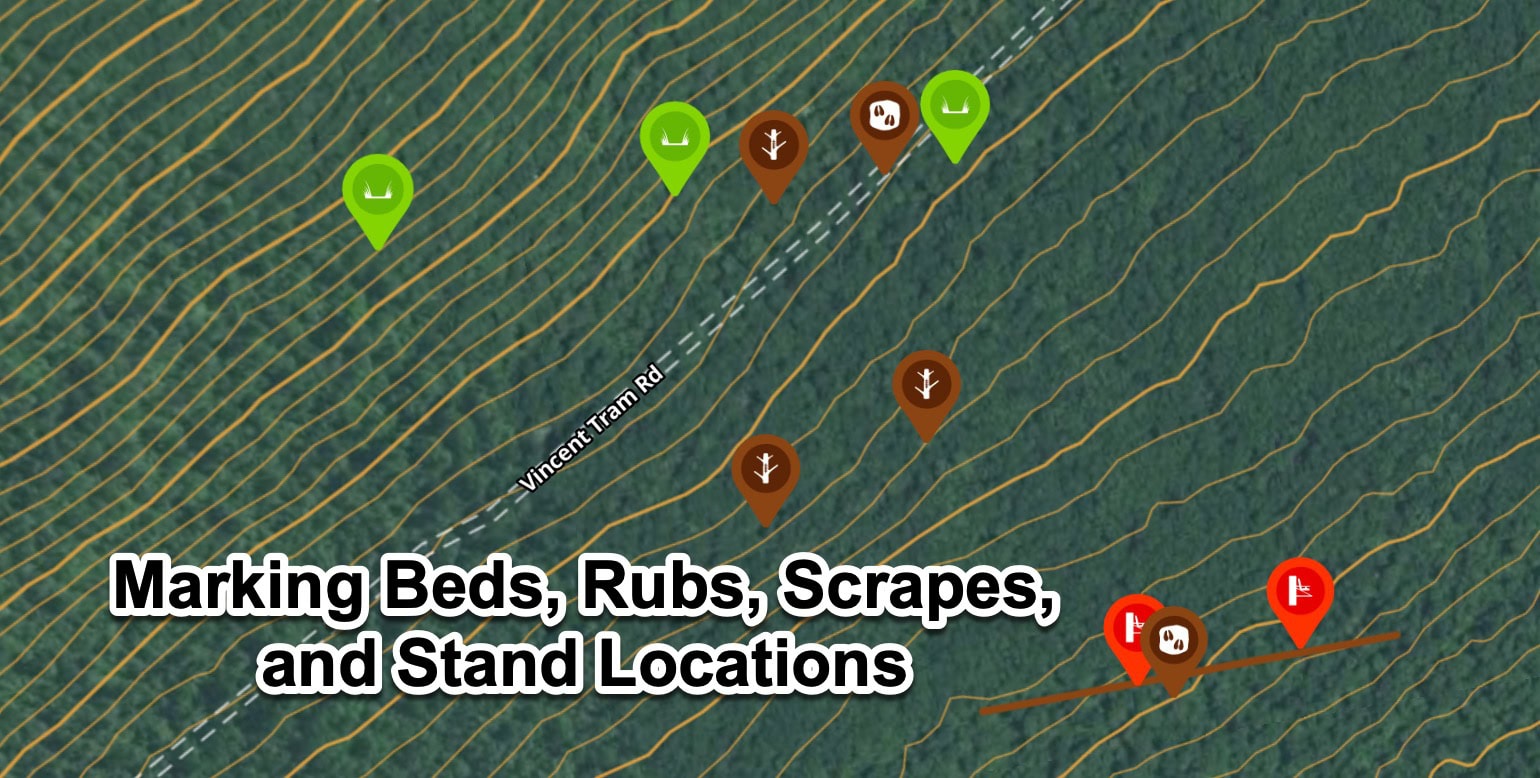
A bedding candidate can look perfect and still be unhuntable. Before I keep it, I study the roads, trails, parking areas, property boundaries, likely hunting pressure, prevailing wind, thermal direction, and possible entry and exit routes.
Ask two different questions:
- Why would a buck feel safe bedding there?
- Can I learn from or hunt that location without letting my scent, sound, or access ruin it?
The best map pin is worthless if every approach crosses the expected travel route or dumps your scent into the bed. Sometimes the smartest move is to observe from outside the area, gather more information, and wait for better conditions.
For a deeper look at mountain air movement, read Hill Country Buck Bedding and my guide to timing thermals for bowhunting.
Rank Each Bedding Candidate: Yes, Maybe, or No
Kill Zone Mapping already uses a 0–10 scoring system for evaluating a potential setup. I do not want another score competing with that. During digital scouting, I keep the filter simple: Yes, Maybe, or No.
YES
The map gives you a clear reason the location could provide security, a wind or thermal advantage, visibility or sound, an escape route, and manageable pressure.
MAYBE
Some pieces fit, but imagery, access, cover, pressure, or wind behavior is unclear. Keep it as a secondary field-check candidate.
NO
The feature is only a travel route, lacks security cover, has obvious pressure, or cannot be approached without damaging the area.
For each candidate, answer these six questions:
- Is there enough security cover for daylight bedding?
- Does the location offer a believable wind or thermal advantage?
- Can the buck see, hear, or smell danger before it reaches him?
- Is there a fast escape route into thicker or harder terrain?
- Does seasonal food, water, doe bedding, or movement support the location?
- Can you verify or hunt it without advertising your presence?
Hypothetical Public-Land Example
This example is hypothetical, but it follows the same process I use.
You find a ridge point about two-thirds of the way up a mountain. The topo layer shows a small bench just below the point. Aerial imagery shows thicker cover on the leeward side, while LiDAR reveals an old logging road that creates another flat spot and quiet travel route.
The first access idea comes from the bottom, but that route climbs through the likely evening travel and lets thermals pull your scent uphill. The ridge-top access is longer, but it keeps you outside the cover and gives you a possible observation point. You mark the bench as a bedding candidate, the suspected escape route, the bad access, the better observation point, and the wind directions that might make the area worth checking.
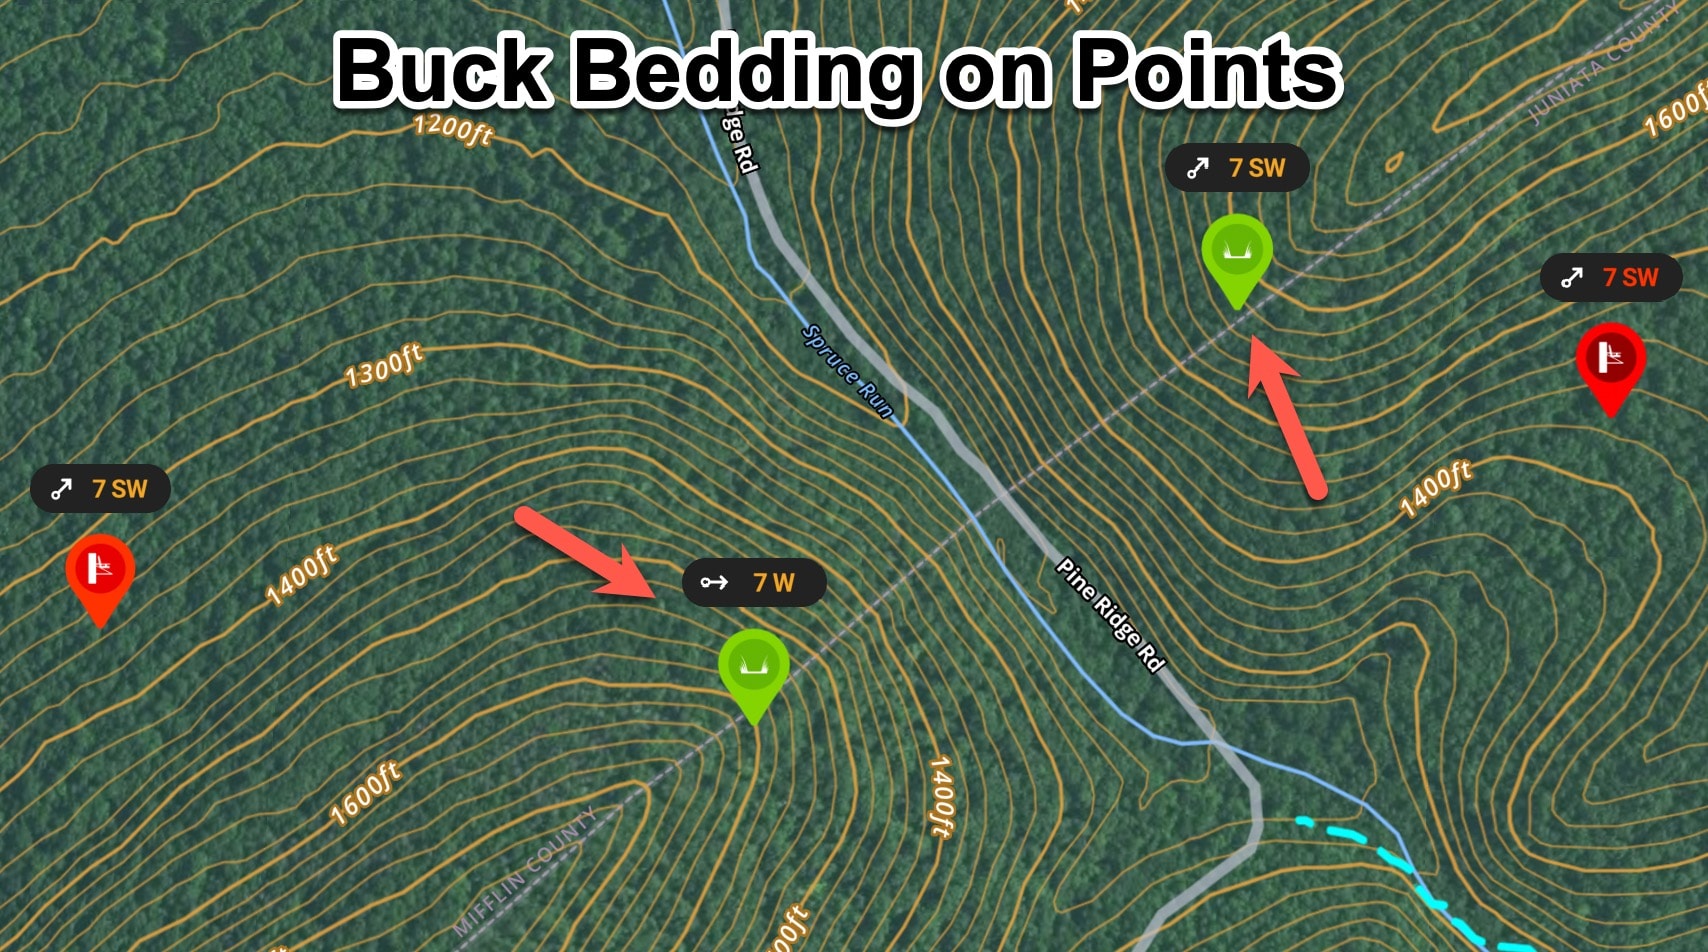
You do not call it a confirmed buck bed. You rank it Yes and plan a low-impact winter or early spring field check. If you find a mature bed, hair, large tracks, rubs, and a usable escape trail, the candidate becomes real evidence. If the ground does not support the map, you change the plan.
Field-Check the Best Candidates Without Blowing Them Up
Maps save time, but boot leather confirms the location. When possible, I like to verify bedding after the season, during winter, or in early spring when old sign is easier to see and the next hunting season is still months away.
Look for:
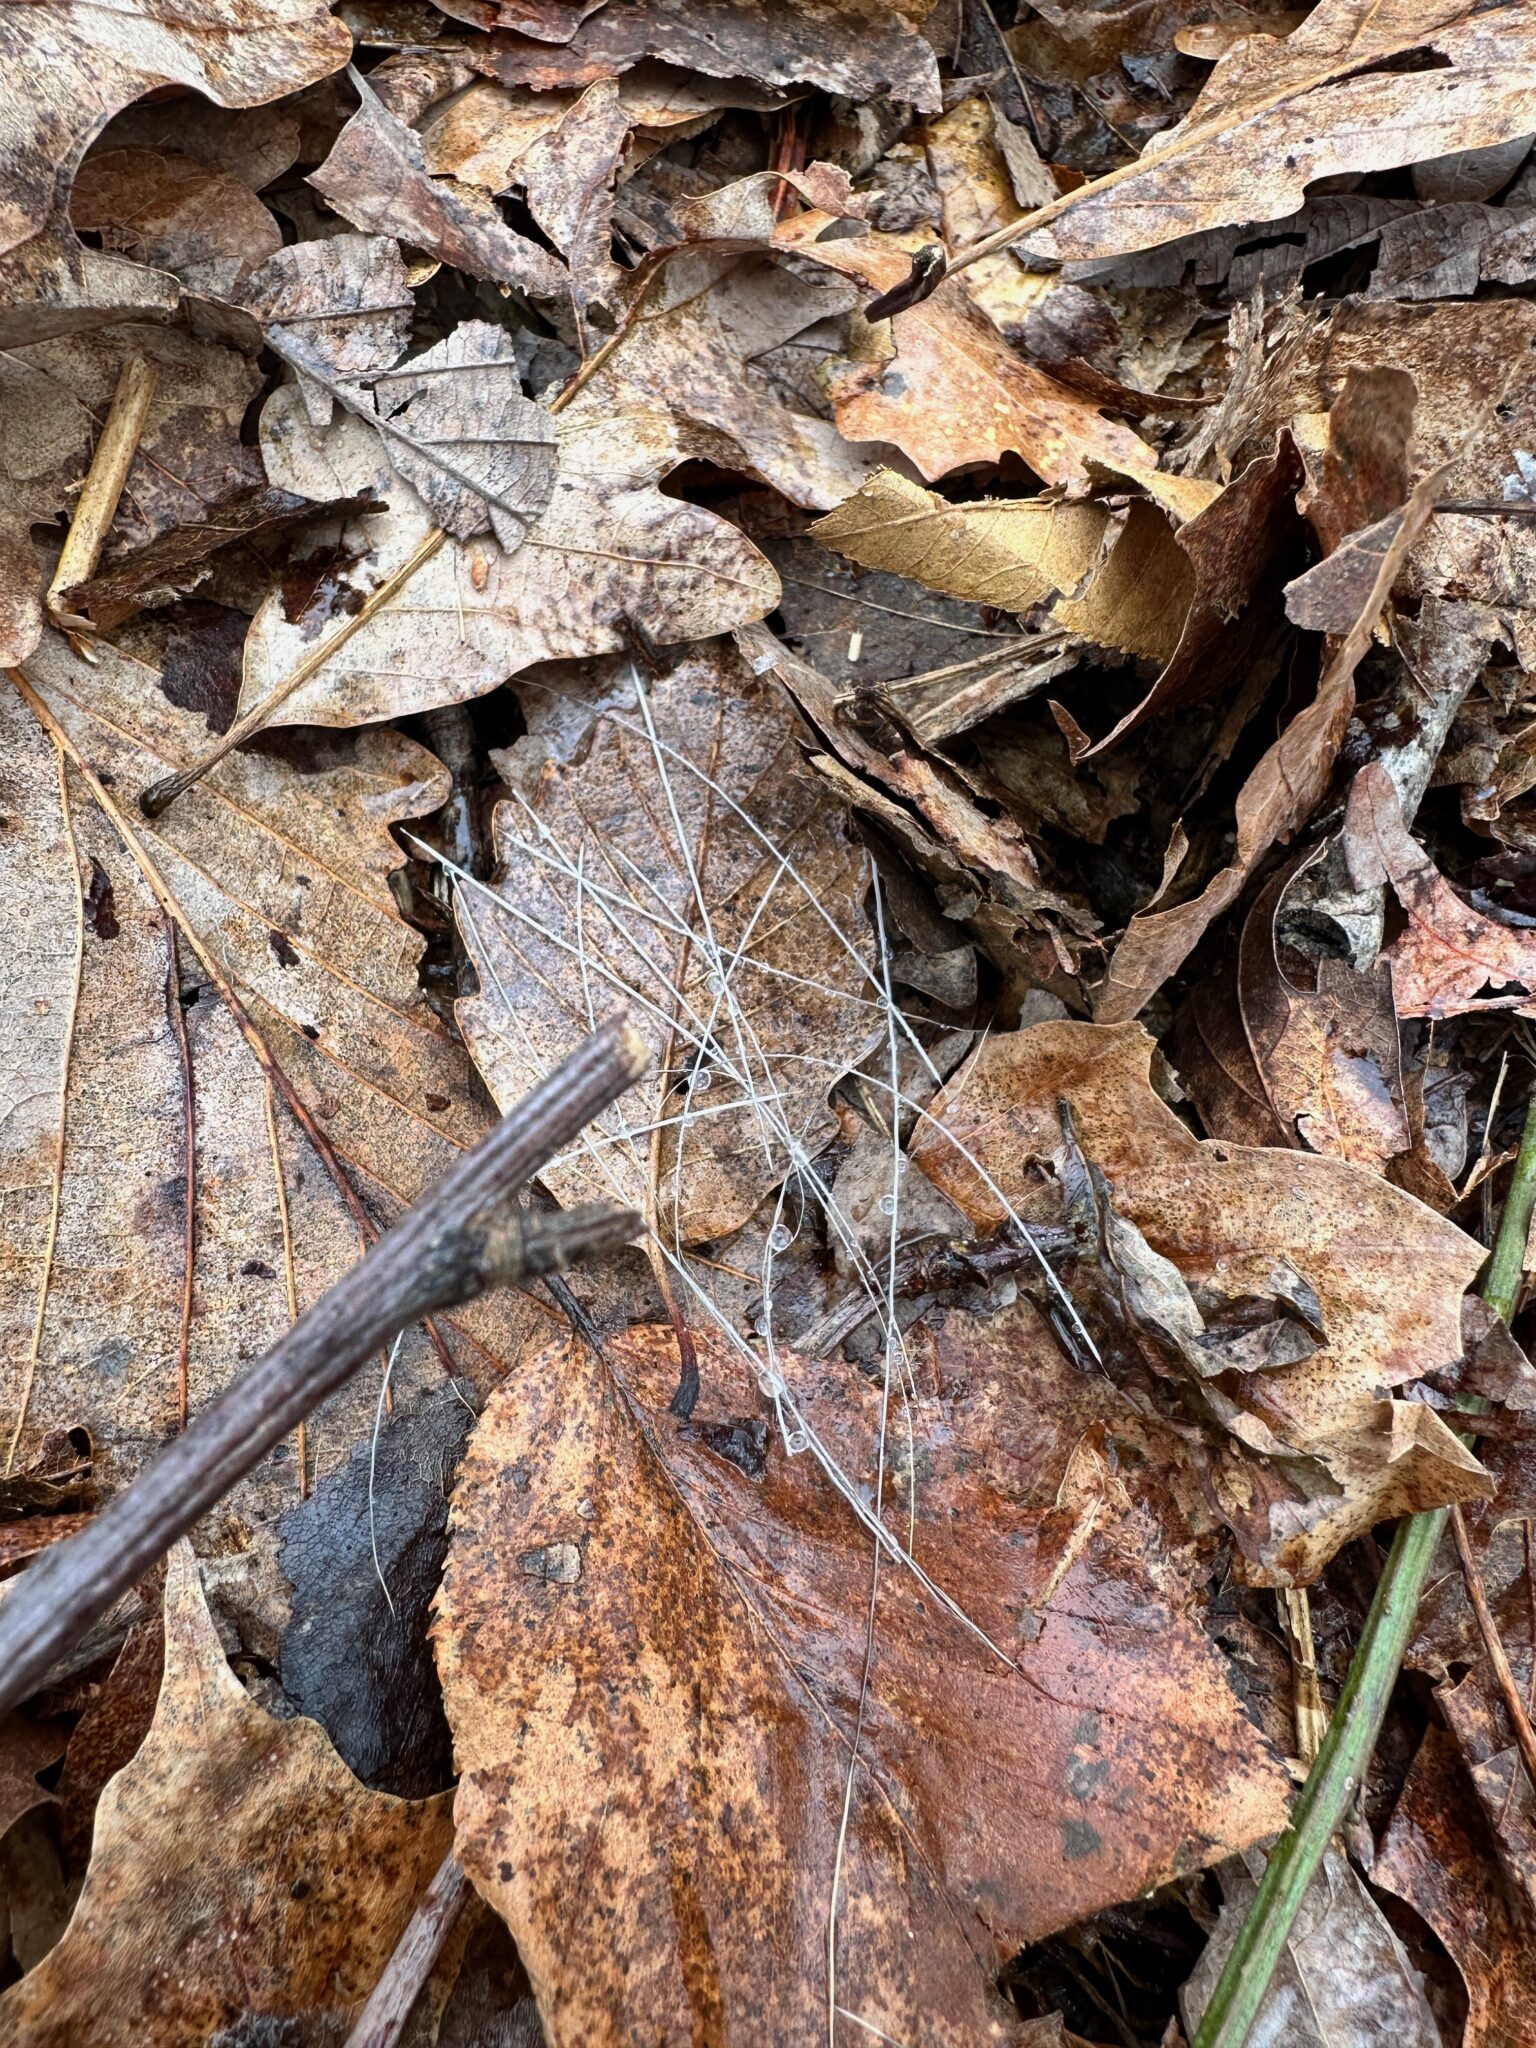
- A bed that fits a mature deer, not just a small depression
- Hair in the bed and worn ground beneath it
- Large tracks, rubs, droppings, and nearby staging sign
- A trail entering from expected feeding or travel cover
- A fast escape route into thick, steep, wet, or difficult terrain
- Evidence that shows how wind, thermals, sight, and cover work together
Save notes, photos, wind, sign, and the direction of the best trail in your app. If you use a GPS track, review it later with the terrain and aerial layers. The goal is to build historical knowledge you can use next season and several seasons from now.
For the complete field process, use Scout Buck Bedding Without Blowing It.
Common Digital-Scouting Mistakes
- Treating a map pin as proof. A great-looking feature can be empty, pressured, or used only during a short seasonal window.
- Ignoring access. If you cross the travel route or blow scent into the cover, the location may not be huntable.
- Relying on one layer. Topo, aerial, LiDAR, wind, pressure, and field sign should support one another.
- Assuming one bed works in every condition. Mature bucks often use a network of beds.
- Walking straight to every candidate. Some areas should be checked from a distance or saved for low-impact seasonal scouting.
- Using old imagery without checking for change. Logging, storms, burns, roads, and hunting pressure can rewrite the area.
- Pinning everything. If you cannot explain why a waypoint matters, it is probably clutter.
How This Fits the Everyday Bow Hunter System
This guide gives you the first filter. The rest of the system turns that information into a decision you can use.
- Map the candidate. Use terrain, cover, access, wind, and pressure to build a short list.
- Confirm the evidence. Field scout, observe, and compare the ground to the map.
- Build Deer Intelligence. Add food, cover, timing, weather, pressure, and historical knowledge.
- Use Kill Zone Mapping. Score whether a specific setup can work without your access, wind, scent, or noise ruining it.
- Create the 3 Hunt Plan. Build a Primary, a Pivot, and a Wait/Observe option so one bad wind does not end the day.
Where Kill Zone Mapping Takes Over
Finding a likely bedding area with maps does not tell you where to hang a stand or make a ground setup. That is where Kill Zone Mapping takes over.
Use the confirmed bedding evidence to mark the area you need to protect. Then work outward and evaluate the last 200 yards of the hunt: your entry, wind, thermals, noise, concealment, expected deer movement, shot opportunity, and exit. A bedding location can be real while the setup you first imagined is still wrong.
- The bedding map tells you where the security cover and likely movement begin.
- Kill Zone Mapping tells you whether your approach and setup can survive close contact with that bedding area.
- The 3 Hunt Plan gives you a Primary, Pivot, and Wait/Observe choice when real conditions do not match the original plan.
This separation matters. Do not give a digital bedding pin a 0–10 score. First rank it as Yes, Maybe, or No and verify it. Once you have real evidence and a specific huntable setup, use the Kill Zone Mapping scorecard.
Why Distance From Bedding Matters
My review of the 10-year deer research found that the 75–150-yard zone from a bed produced 45% of mature buck kills. Only 15% happened closer than 75 yards, where wind, thermals, access, and timing have to be nearly perfect. Another 30% happened 150–300 yards from bedding, while only 10% occurred beyond 300 yards.
That does not mean every stand should be exactly 75–150 yards from a bed. Terrain, cover, season, pressure, and access still decide what is possible. It does show why finding bedding on the map matters. Bedding gives Kill Zone Mapping an anchor point so you can evaluate the strike window instead of guessing from a food plot or trail alone.
Read the full breakdown in Where Bucks Bed and How to Hunt Them Without Blowing It and The Last 200 Yards.
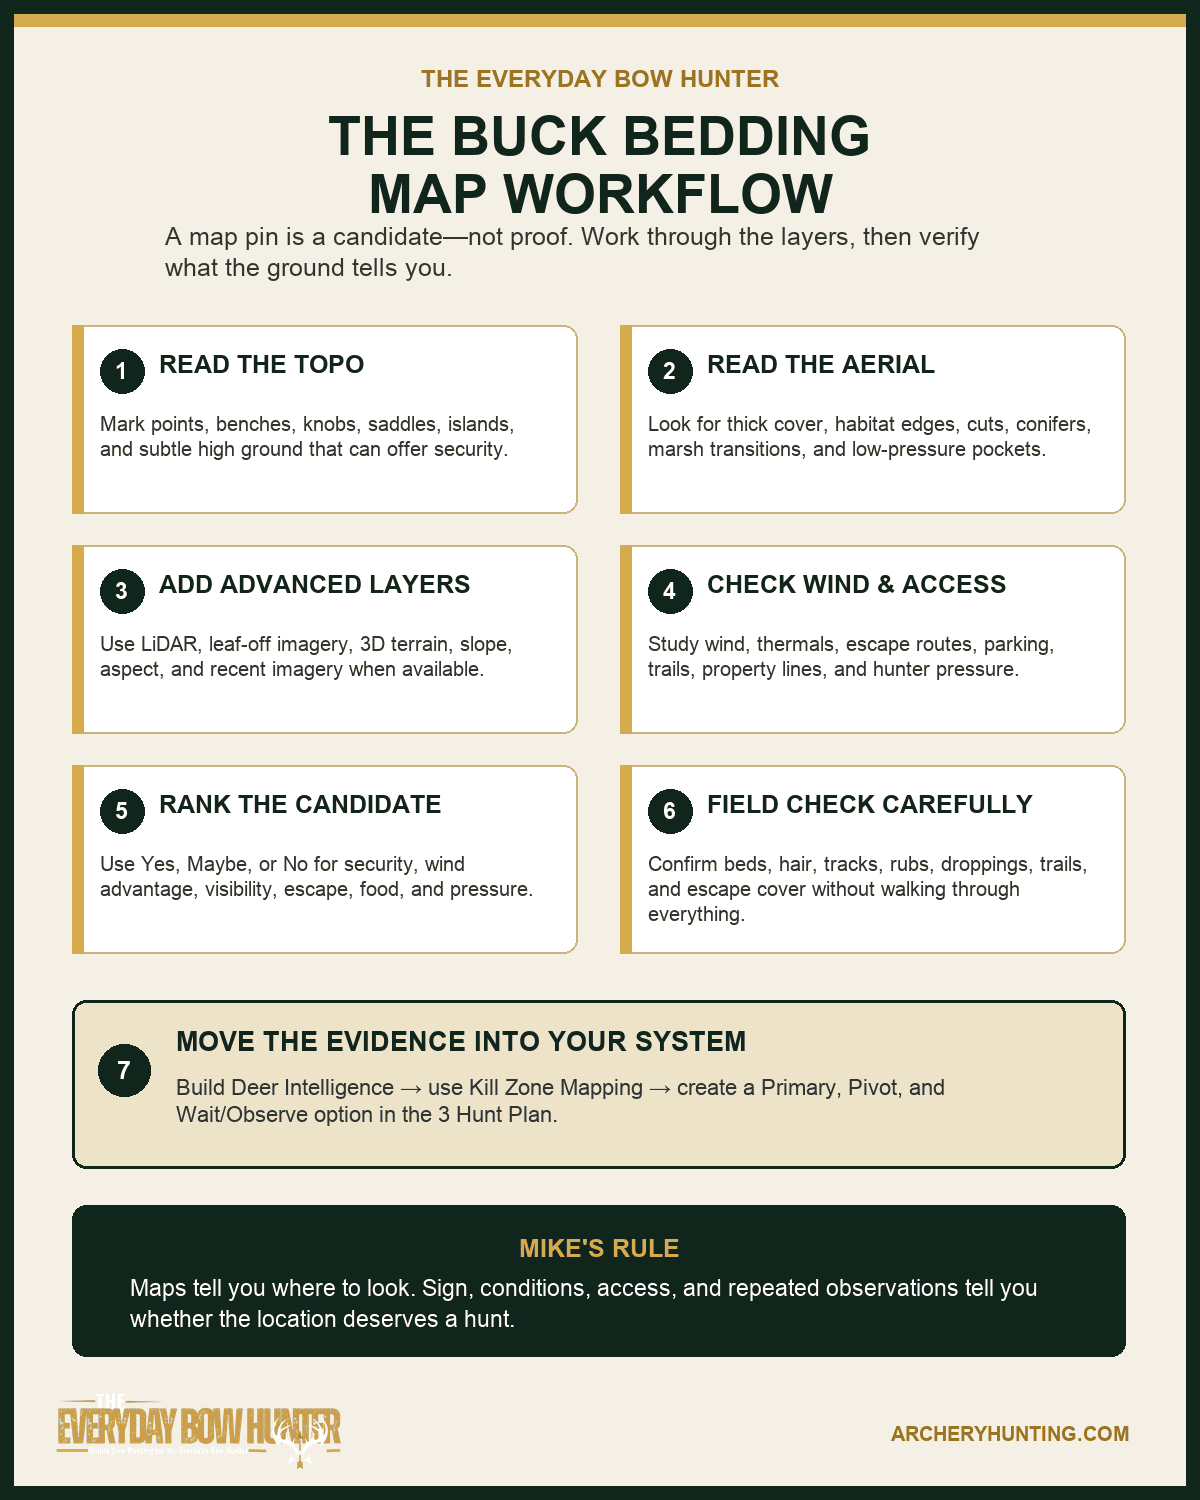
My rule: Maps tell you where to look. Sign, conditions, access, and repeated observations tell you whether the location deserves a hunt.
Frequently Asked Questions
Can a map confirm a buck bed?
No. A map can show a likely bedding feature, but the location remains a candidate until field sign, observations, or repeated use support it.
What is the best map layer for finding buck bedding?
Start with a hybrid view that combines terrain and aerial imagery. Then switch between topo, aerial, LiDAR or shaded relief, leaf-off imagery, 3D, slope, aspect, and access layers as needed. No single layer gives you the whole answer.
Do mature bucks use the same bed every day?
Not always. Mature bucks often use a network of beds based on wind, thermals, pressure, food, cover, season, and breeding activity. Historical knowledge helps, but the current evidence still matters.
When is the best time to field-check bedding?
Winter and early spring are usually my preferred times because old sign is easier to see and you have time before the next season. In-season scouting can work, but it requires more restraint because one careless entry can change the pattern you are trying to hunt.
How close should I get to a bedding area?
Only as close as the conditions, cover, wind, access, and current evidence allow. Sometimes you can hunt close. Other times the better choice is to back out, observe, or wait for a better day. Do not force a setup because the map looked good.
EBH Next Steps
1. Understand the Bed
Learn how bucks use security, wind, sight, terrain, and pressure before you try to hunt the map pin.
2. Verify It Carefully
Use a low-impact field check to confirm the sign without teaching the buck what you are doing.
3. Build Deer Intelligence
Connect the bedding evidence to food, cover, weather, timing, pressure, and movement.
4. Evaluate the Setup
Use Kill Zone Mapping to test access, wind, thermals, shot opportunity, and the last 200 yards.
Next Step: Test the Bedding Theory
Finding likely bedding on a map gives you a starting point. The onX Hunt Kill Zone Mapping example shows how to add ground sign, cameras, pressure, wind, access, and timing before turning that theory into a hunt plan.
Want to see exactly what I’m carrying this season? Check out my Personal Bowhunting Gear List for 2026