
A different point weight can tell you a lot about how an arrow is reacting from your bow. Add weight to the front and the arrow will usually react weaker. Remove weight and it will usually react stiffer. That makes a set of field points useful when you are trying to diagnose a spine or flight problem.
The test does not let you skip bow tune, component planning, or broadhead practice. A heavier point also changes finished weight, FOC, speed, trajectory, and the load on the front of the shaft. You are looking for the direction the arrow responds, not asking one field-point group to choose the whole hunting build.
Start with the point weight your arrow was planned around, shoot a repeatable group, and change one thing at a time. The pattern you see can help you decide whether to keep testing point weight, correct the bow, or return to the shaft and component plan.
What Point-Weight Testing Can Show You
A manufacturer spine chart gives you the static-spine range for the shaft. The finished arrow still reacts to your real draw weight, draw length, shaft length, point and insert weight, nock-end weight, release, and bow tune. That reaction is dynamic spine. If the starting arrow is still undecided, use my arrow-buying guide before using this test.
READ: Understanding Arrow Spine and Spine Deflection
You can choose the charted shaft and still see a poor paper-tune result, inconsistent groups, or broadheads that will not join the field points. Point-weight testing helps show whether changing the front load moves the arrow in a better or worse direction.
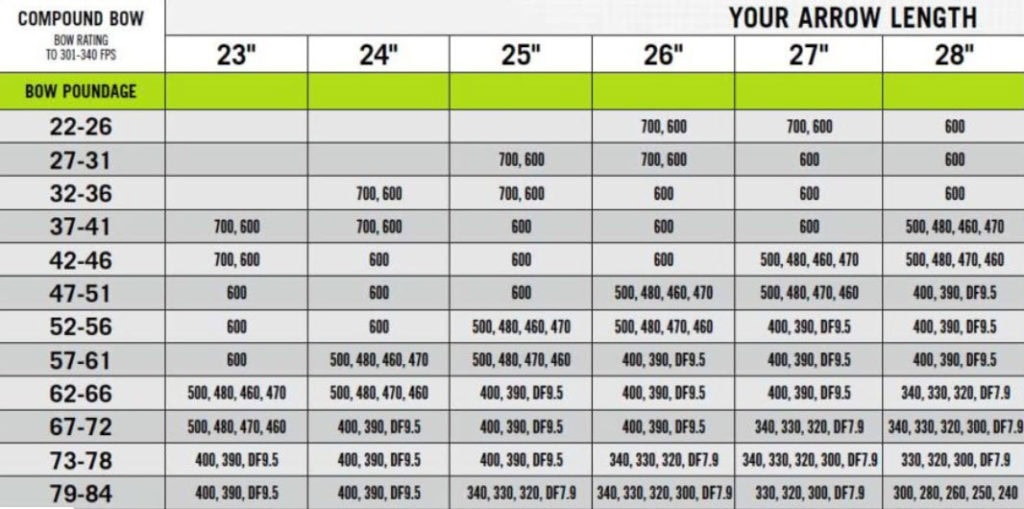
More front weight usually makes the finished arrow react weaker. Less front weight usually makes it react stiffer. The same change also affects weight, FOC, speed, and trajectory, so keep the result connected to the whole build.
Shoot the same arrow setup with known point weights and keep your form, distance, target, and bow settings consistent. If the group or paper result improves in one direction, you have a useful clue. You still need to confirm the cause and prove the hunting broadhead.
Therefore, even if you buy arrows from a local store or online that have a matching static spine, it’s still important to fine-tune your arrows to achieve an optimal dynamic spine and ensure a successful hunting season. If you are having flight issues with your arrows and can’t figure out why, this might be the problem.
Point weight is one diagnostic lever, not the entire tuning process. If a weight change improves the group, carry that change into the complete arrow plan and then use the hunting-arrow tuning guide to confirm clearance, finished-arrow groups, and broadhead impact. Do not keep changing point weight when the broadhead system is already proven.
How Point Weight Changes the Arrow’s Dynamic Reaction
Point-weight testing changes the load at the front of the shaft without forcing you to rebuild the entire arrow between shots. That makes it a practical diagnostic test. It is not a promise that the best field-point group identifies the best finished hunting arrow.
An arrow flexes during the shot. Dynamic spine describes how the finished arrow reacts to the bow and every installed part. Too much or too little reaction can make tuning and broadhead flight harder.
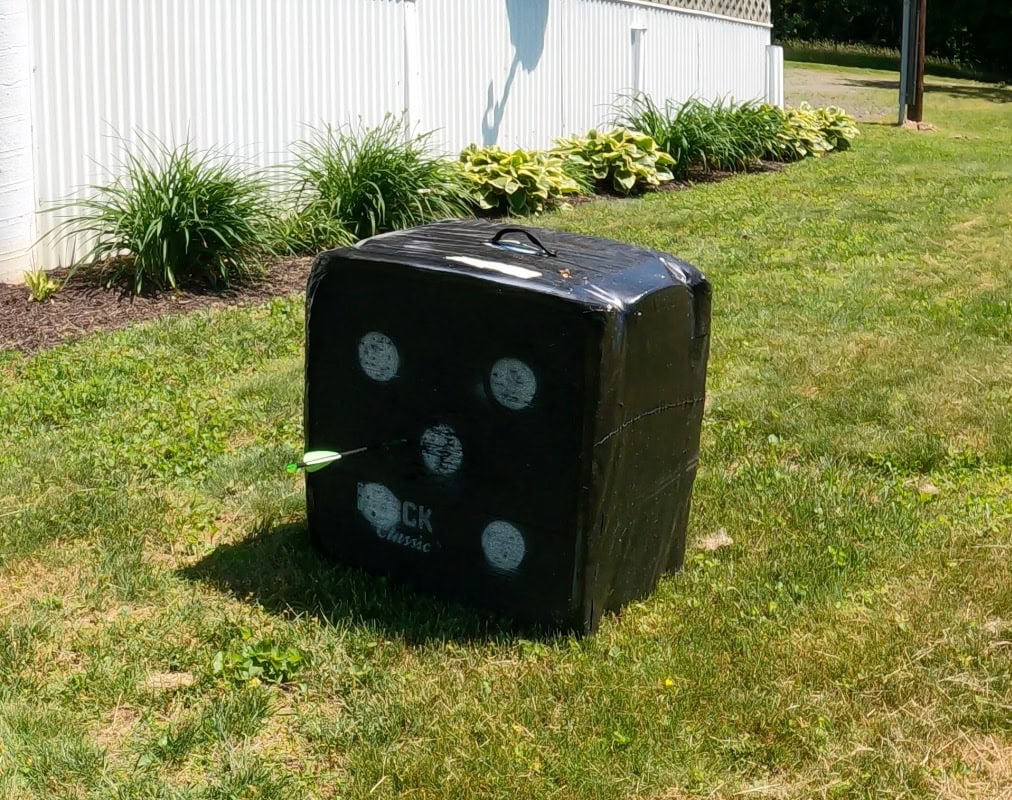
By starting with a 100-grain field point and moving up in 25-grain increments, you can evaluate the flexing of your arrows and determine the optimal spine for your setup. If your arrows are not flying straight or are inaccurate with a particular weight, it could indicate that the spine is not matched to your setup correctly.
The weight that improves the test gives you a direction to investigate. Check the full component plan before choosing a broadhead or ordering a complete batch.
NOTE: A heavier field point or broadhead raises total arrow weight, moves FOC forward, and generally makes the arrow react weaker dynamically. That can be useful for tuning, but it does not prove that the heaviest point will be the most accurate or penetrate best. Recheck total weight, FOC, and dynamic spine before buying a full set of components.
READ: Heavy or Light Arrows: Arrow Weight vs. Arrow Speed
Follow these steps to optimize your arrow’s dynamic spine for perfect flight, accuracy, and penetration:
Step 1: Start With the Point Weight You Planned
Use 100 grains when that is the baseline for your planned broadhead system. If your build starts at 125 grains, begin there instead. Shoot a repeatable group and record impact, group shape, paper result when used, and anything you changed on the bow.
Follow this process:
- Choose a 100-Grain Field Point: Start by selecting a 100-grain field point. This is a common weight used by many bow hunters, and it’s a good starting point for fine-tuning your arrows.
- Shoot Several Arrows: Shoot several arrows with the 100-grain field point to evaluate their flight characteristics. Note the arrow’s speed, trajectory, and accuracy. You can use the paper tuning method to evaluate if your arrows are flying straight.
- Analyze the Results: Analyze the results of your first round of shooting with the 100-grain field points. Look for any inconsistencies or issues with your arrows’ flight characteristics. If your arrows are not flying straight or are inaccurate, you may need to adjust your bow or other equipment before moving on to a heavier field point weight.
- Repeat the Process: If you are satisfied with the performance of your arrows, move on to the next weight, such as 125 grains, and shoot several arrows to evaluate their flight characteristics. Repeat this process until you have tried different field point weights between 100 and 175 grains.
- Shoot Each Set of Arrows at Least Five Times: It’s essential to shoot each set of arrows at least five times to ensure proper flight and accuracy. This will give you a good idea of how your arrows perform consistently.
By starting with a 100-grain field point and shooting several arrows before moving on to a heavier weight, you can evaluate your arrow’s flight characteristics and make adjustments as needed. Shooting each set of arrows at least five times will give you a good idea of their consistent performance.
By increasing the field point weight by 25 grains and shooting several arrows before moving on to a heavier weight, you can evaluate your arrow’s flight characteristics and make adjustments as needed. Shooting each set of arrows at least five times will give you a good idea of their consistent performance.
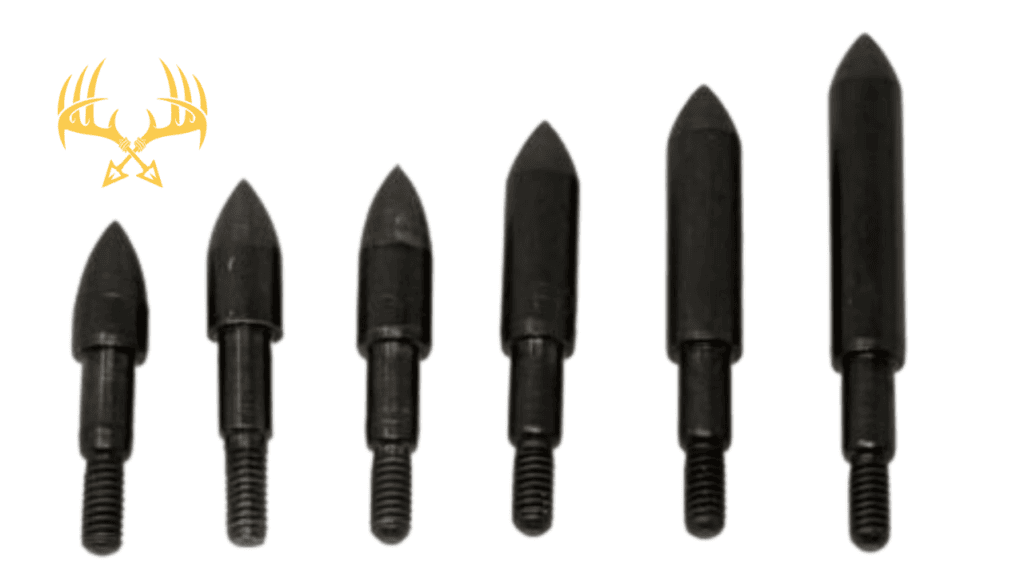
Step 2: Carry the Promising Weight Into the Broadhead Plan
A promising field-point weight gives you a broadhead weight to test, not a finished answer. Choose a hunting head of the same nominal weight, confirm component compatibility, and check what the new front load does to total weight, FOC, speed, trajectory, and projected dynamic spine.
Follow this process:
- Choose the Optimal Field Point Weight: Once you have tried different field point weights and evaluated their flight characteristics, choose the optimal weight for your arrows. The weight that gives you the best performance and accuracy is the weight you should use for your hunting arrows.
- Choose the Corresponding Broadhead Weight: Once you have determined the optimal field point weight, choose the corresponding broadhead weight. The weight of your broadhead should match the weight of your field point to ensure consistent flight characteristics between practice and hunting arrows.
- Shoot Several Arrows: Shoot several arrows with your new broadheads to evaluate their flight characteristics. Note the arrow’s speed, trajectory, and accuracy. Use the paper tuning method to evaluate if your arrows are flying straight.
- Analyze the Results: Analyze the results of your shooting with the new broadheads. Look for any inconsistencies or issues with your arrows’ flight characteristics. If your arrows are not flying straight or are inaccurate, you may need to adjust your broadheads or other equipment.
- Fine-Tune Your Broadheads: Shoot the hunting broadheads and compare their groups and impact with your field points. Correct the bow, arrow, or broadhead setup until both group together at the distances you plan to hunt.
- Check Your Broadhead Alignment: Make sure your broadheads are aligned with your fletching. A misaligned broadhead can cause erratic arrow flight, so it’s crucial to check this before shooting.
Once a broadhead weight looks promising, tune and verify the real hunting arrow. Make one change at a time so you know which adjustment moved the group.

Step 3: Prove the Hunting Broadhead at Realistic Distance
Shoot the actual hunting broadhead from the finished arrow at the distances and positions you may use in the woods. Confirm that it groups with your field points, clears the bow, holds together, and stays inside the trajectory and accuracy window you have trained for.
What the Test Means
Point-weight testing helps you see which direction the arrow wants to move. It cannot repair poor form, a loose component, bad center shot, incorrect rest timing, or every bow-tune problem. Treat the result as evidence, then verify the complete build.
Keep dynamic spine connected to the rest of the setup. The manufacturer chart starts the shaft decision. Your point-weight test, bow tune, and broadhead groups help finish it.
Use Point Weight as a Tuning Test, Not a Shortcut
Point-weight testing is a practical way to see how your arrow reacts. A heavier point usually weakens the dynamic reaction; a lighter point usually stiffens it. Make one change at a time and watch the group, the paper tear, and broadhead impact. Once you find a promising point weight, run that component plan through the Arrow Weight Calculator, FOC Calculator, and Dynamic Spine Calculator before ordering a full build.
Your Next Steps
Carry the point-weight change into the full build. More or less point weight also changes finished weight, FOC, and dynamic spine, so check the complete plan before building the batch. Start with the Hunting Arrow Planner.
Use the Everyday Arrow System in this order:
- Compare the finished component plan in the Arrow Weight Calculator.
- Check projected FOC with the FOC Calculator.
- Confirm the front-component load in the Dynamic Spine Calculator, then build one test arrow.
Build one test arrow before you commit to a full batch. That is where the numbers become a real setup.
Change one point weight at a time, record what the arrow does, and prove the hunting broadhead before season. Build one test arrow before you commit to the batch.
Want to see exactly what I’m carrying this season? Check out my Personal Bowhunting Gear List for 2026