

I can make a hunting arrow faster and flatten its trajectory by taking weight out of it. I can add mass, normally add momentum, and improve penetration by adding weight. The physics are not complicated. The real decision is how much speed and trajectory you are willing to trade for mass, momentum, and penetration.
I have built, tuned, and hunted with lighter and heavier arrow systems. The tradeoff that matters is not which side wins an internet argument. It is whether the finished arrow gives your bow enough trajectory for the shots you take, enough room for the components and broadhead you want, and dependable flight when the shot matters.
This comparison breaks down what you gain and what you give up on both sides. Then I will show you where the Everyday Arrow Weight Formula, performance results, and trajectory fit into the decision.
The Short Answer
The tradeoff is real. From the same bow, a lighter arrow normally gives you more speed, a flatter trajectory, and less flight time. A heavier arrow gives up some of that speed and trajectory margin, but it carries more mass and normally more momentum. That added mass and momentum help the arrow keep driving through resistance and improve penetration.
The balanced answer keeps enough speed for the hunter’s real shot window while carrying enough mass and momentum for dependable penetration. That is what the Everyday Arrow Weight Formula helps optimize. It does not create or change the physics. It uses the hunter’s bow and normal shot distance to place a practical Working Range over those tradeoffs.
The Physics Set the Tradeoff. The Formula Helps You Use It
Arrow weight affects speed, trajectory, momentum, kinetic energy, bow noise, and how much front weight you can use. But it does not work alone. Draw weight, draw length, your bow’s real efficiency, shaft spine, arrow length, broadhead weight, insert system, and sight setup all matter too.
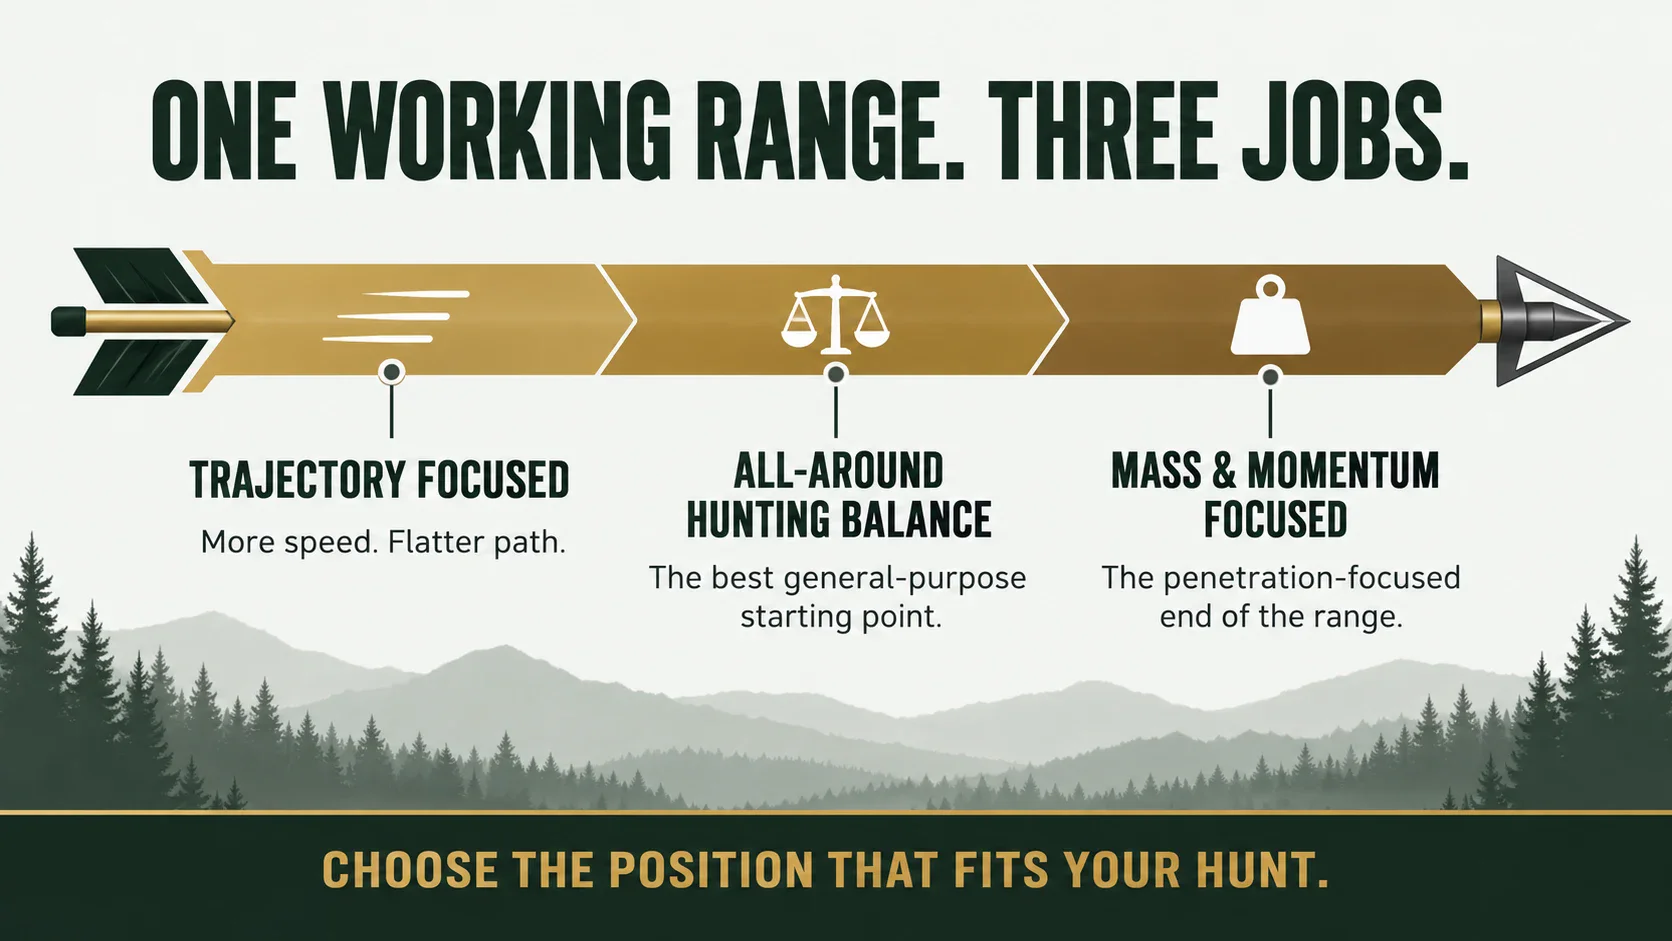
That is why I use the Everyday Arrow Weight Formula. It gives you a bow-specific target and Working Range instead of telling every hunter to shoot 400, 500, or 650 grains. The Formula does not drive the physics. It uses them to help optimize the result. The lower end is Trajectory Focused and gives more weight to speed, a flatter path, and shorter flight time. The center is All-Around Hunting Balance. It keeps useful speed and trajectory while preserving solid mass, momentum, and penetration capability. The upper end is Mass and Momentum Focused. It gives up more speed and trajectory margin to put more mass and momentum behind penetration. From there, you build one test arrow and verify the real results.
Build the arrow as a system, not a single number. Finished weight is only one decision. The Everyday Arrow System connects arrow weight, speed, trajectory, spine, front-end components, broadhead flight, and real-world verification into one repeatable process.
What You Gain—and Risk—With a Lighter Arrow
A lighter arrow normally leaves the bow faster. Its flatter path gives you more forgiveness when the range estimate is a little off, and the shorter flight time gives the animal less time to move before impact. That is the speed and trajectory advantage.
But speed is not free. As arrow weight comes down, the same bow is launching less mass and normally producing less momentum. The arrow has less ability to keep driving through resistance after impact, so penetration capability goes down. The bow may also feel sharper and louder, and the build has less room for a tough front-end system. Go too light and you can fall below your bow manufacturer’s minimum arrow-weight requirement.
A light arrow is not automatically a bad hunting arrow. It is a poor choice only when it is lighter than your bow, intended game, and hunting style call for. If you choose one, make sure it is still safely above the manufacturer minimum, tunes correctly, and flies your broadheads perfectly.
What You Gain—and Risk—With a Heavier Arrow
A heavier arrow leaves the bow more slowly and follows a more curved path. In return, it carries more mass and normally more momentum. That combination helps the arrow keep driving through hide, muscle, and bone, which improves penetration capability. It can also make the bow feel quieter and smoother, and it gives you more room to use sturdy inserts, collars, and a broadhead system you trust. For close-range whitetail hunting, that can be a very good trade.
That penetration advantage comes with a clear cost. As speed drops, the arrow takes longer to reach the animal and drops more quickly after the zero distance. That makes exact range more important farther out. A heavy arrow can be excellent inside 30 yards and still be the wrong answer for a hunter who often shoots 45 or 50 yards.
This relationship is serious enough to appear in hunting requirements. South Africa’s published national standards set minimum arrow weight and kinetic energy by animal size. For large game such as wildebeest, kudu, gemsbok, zebra, waterbuck, and hartebeest, the standards require at least a 415-grain arrow and 60 foot-pounds of kinetic energy. That is not internet theory. It is a practical recognition that larger animals require more penetration capability. Always check the current rules for the country, province, and species before a hunt. Read the South African government standard.
That extra time in the air also gives a deer more opportunity to move after it hears the shot. An alert whitetail may lower its body to load its legs before the arrow arrives, which can move the vital zone below the original aim. This does not create one minimum-speed rule for every hunter. It is another reason the heavier build must keep enough speed for your verified distance and shot window. My Best Arrow Speed for Hunting guide explains the speed balance, and my string-jumping analysis follows the complete release-to-impact timeline.
There is another pitfall that gets missed: many heavy-arrow builds add weight to the front. That can weaken dynamic spine. If you add a heavier broadhead, insert, or collar, you may need a stiffer shaft—not just more weight. A build that looks great on paper but will not tune is not optimized.
Trajectory Focused
Usually makes sense when: you need more speed and trajectory margin at your normal distances.
- Flatter path
- Less time of flight
- Less mass and momentum
- Less penetration capability
- Must remain above the bow minimum
All-Around Hunting Balance
Usually makes sense when: you want the best general-purpose starting point for your bow, normal distance, and components.
- Practical speed and trajectory
- Useful mass and momentum
- Room to solve spine and components
- Verified with real shooting
Mass and Momentum Focused
Usually makes sense when: close-range hunting and penetration are the priority.
- More mass and momentum
- Better penetration capability
- Often smoother bow behavior
- More drop and time of flight
- May require a stiffer spine
Trajectory Is the Tradeoff You Need to See
Most hunters do not need another generic warning that a heavier arrow “drops more.” They need to see what that means at their sight setting and their normal shot distance.
With a 25-yard zero, an arrow may rise a few inches above your line of sight at close range, then cross the line of sight at 25 yards and continue dropping. Your center-hold bracket is the distance range where you can hold center and keep the modeled arrow path inside a chosen aiming window—such as plus or minus four inches.
That bracket is useful because it turns speed into a hunting decision. If your normal shots are 30 yards or less, a slightly slower, heavier arrow may still give you a very workable center-hold bracket. If you regularly hunt farther, the same speed loss may shorten that bracket and make range errors matter more.
Do not guess at this. Use the Hunting Arrow Trajectory Calculator with your actual or estimated speed, sight height, and selected zero. It shows your arrow rise, drop, five-yard range error, and center-hold bracket. Then compare the lighter and heavier option before you buy a dozen shafts or rebuild your current arrows.
The calculator is not a replacement for shooting your bow. It is a planning tool. Chronograph your setup when you can, sight in at the real distance, and verify every pin before hunting. But it will show you whether an extra 40 or 60 grains is a smart trade for your style of hunting.
Momentum and Kinetic Energy Still Matter—But They Are Not the Whole Decision
Arrow weight affects both momentum and kinetic energy, but not in the same way. Within practical hunting weights, adding mass from the same bow normally raises momentum even as speed drops. The heavier arrow is slower, but it is better equipped to keep driving through resistance. The lighter arrow is faster, but it gives up some of that penetration capability. Kinetic energy may change less than hunters expect because it depends on both weight and speed.
That is why I do not pick an arrow from one number. I use the Arrow Performance Calculator to compare finished weight, speed, kinetic energy, and momentum together. Then I use the trajectory calculator to decide whether that speed is still practical for the way I hunt.
A heavier arrow does not fix poor arrow flight, a dull broadhead, bad shot placement, or a bow that is out of tune. A lighter arrow does not become better simply because it is faster. Both have to work as part of a complete arrow system.
My Rule for Close-Range Whitetail Hunting
For my normal hunting, I am comfortable giving up some speed to gain a durable, well-tuned arrow system. Most of my opportunities are inside 30 yards. I care about quiet bow behavior, dependable broadhead flight, a solid front end, and a trajectory that still gives me room to hold center on a deer-sized vital area.
That does not mean everyone should copy my finished arrow weight. A hunter with a shorter draw length, lower draw weight, longer normal distances, or a different bow may need a lighter target to keep trajectory practical. That is exactly why the Formula is bow-specific.
How to Choose the Right Arrow Weight for Your Bow
- Start with the Everyday Arrow Weight Formula. Use your draw weight, draw length, IBO speed, and normal hunting distance to get a practical finished-arrow target.
- Compare the lighter and heavier options. Use the Arrow Performance Calculator to see what weight does to speed, momentum, and kinetic energy.
- Check the real trajectory tradeoff. Put both speeds into the Trajectory Calculator and compare the center-hold bracket, rise, and drop at the distances you hunt.
- Build around correct dynamic spine. If you add significant front weight, check whether the shaft must become stiffer.
- Build one test arrow first. Verify finished weight, actual speed, tune, broadhead flight, and the bow manufacturer minimum before you finish the batch.
Do Not Chase an Extreme for No Reason
The internet makes it easy to believe every hunter needs a super-light speed build or a very heavy penetration build. Most hunters need neither extreme. They need enough speed and a flat enough trajectory for a clean shot, plus enough mass and momentum for strong penetration. The right finished weight is the point where those two sides work together for the bow, broadhead, normal distance, and game.
That is what an optimized arrow means. It is not a universal grain number. It is a complete system built for a specific hunter.
If you are ready to move from the comparison to a bow-specific decision, read Best Arrow Weight for Hunting. If you already have your range and want the build order, use How to Choose the Right Arrow Weight.
Ready to Build the Right Arrow?
Do not choose between heavy and light in isolation. Start with the Everyday Arrow System and build a hunting arrow around your bow, your normal distance, and the way you hunt.
Next Steps: Build the Arrow as a System
Turn the Weight Decision Into a Complete Arrow
Arrow weight is only one part of the build. Use the Hunting Arrow Planner to compare that weight with speed, trajectory, components, FOC, and dynamic spine before you build the full batch.
- Find your bow-specific finished-arrow target with the Everyday Arrow Weight Formula.
- Compare arrow speed, momentum, and kinetic energy.
- See the trajectory, center-hold bracket, and range-error tradeoff.
- Check the dynamic-spine effect of your front end.
- Follow the Arrow Build Guide to turn the plan into a tuned hunting arrow.
Want to see exactly what I’m carrying this season? Check out my Personal Bowhunting Gear List for 2026