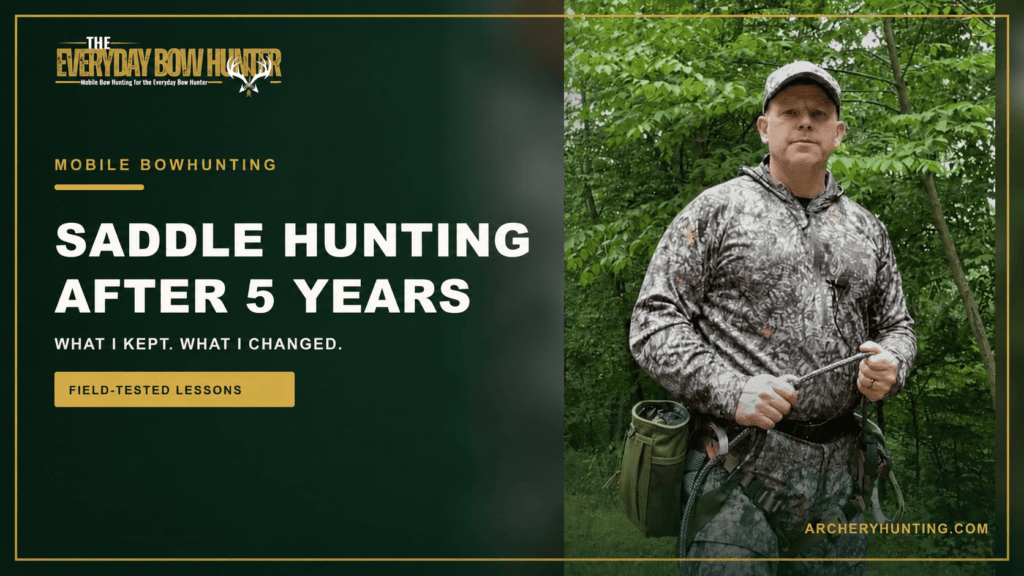
Saddle hunting is not worth doing because it looks different or because it became popular. I got into it for one reason: mobility.
I have shoulder, back, and knee problems. Carrying less weight matters to me, especially when I am covering ground, reacting to fresh sign, and setting up in a tree that a climbing stand would never fit. Five years of saddle hunting have helped me cut weight, but the bigger lesson is that the equipment only works when the whole setup has a repeatable job.
I wear my saddle into the woods. My left pouch always carries the same rope. My right pouch always carries the same tether. My bow, quiver, pack, and release go in the same places once I am in the tree. That system lets me work in the dark without wondering where I put something.
The equipment has changed over five seasons, but that is not the most important part of this update. Tree position, shot direction, rope management, and setup order have changed how I hunt from a saddle. Those lessons should control what you buy and how you practice before you ever climb with it.
My Current Saddle Hunting Setup
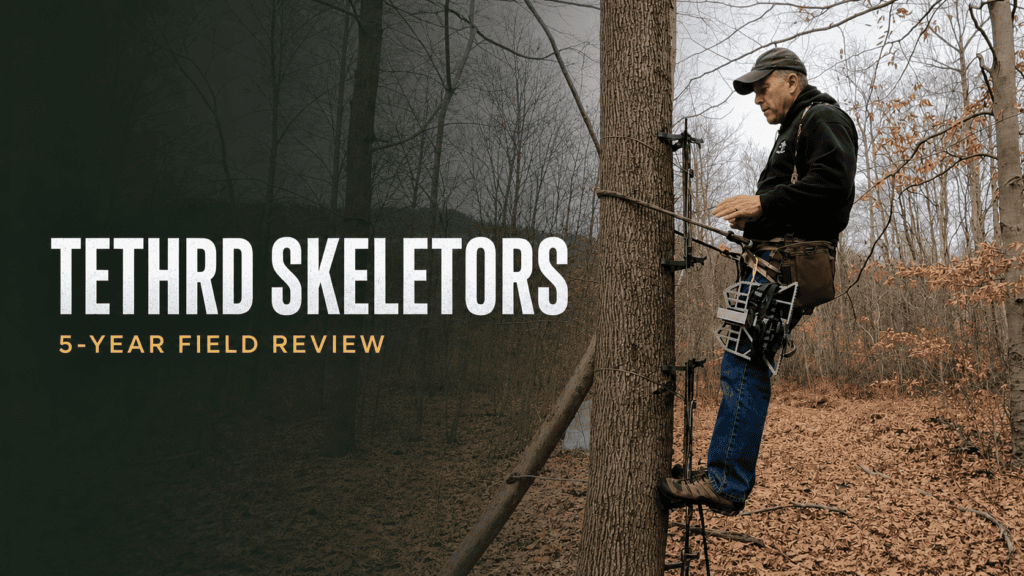
This is the system I am carrying now. The Ranger 22 is my full-load setup. The smaller Profile Platform Pocket is for short hunts close enough to the truck that I can safely leave some supporting gear behind. The Tethrd Skeletors are still my favorite climbing sticks for the money, even though I am using the lighter Latitude Carbon SS sticks more this season.
For the product-by-product buying decision, including what I would buy again, what is optional, and where the system falls short, read my full Latitude Outdoors saddle hunting system review.
| System role | What I use | Why it is there |
|---|---|---|
| Saddle | Latitude Maverick | Compact saddle I wear into the woods |
| Platform | Latitude Profile | Low-profile platform with useful leveling adjustment |
| Current sticks | Four Latitude Carbon SS sticks | Lower carry weight and a one-step aider on the first stick |
| Favorite-value sticks | Tethrd Skeletors | Proven, solid, and easy to pack with two-step aiders |
| Full pack | Latitude Ranger 22 | My complete saddle-hunting loadout |
| Minimal carry | Profile Platform Pocket | Short hunts near the truck |
| Ropes | Tethrd 8mm tether and lineman rope | Less bulk in my saddle pouches |
| Rope devices | Ropeman 4 | Matched to my 8mm ropes for fast adjustment |
| Tree organization | Latitude Gear Strap and Bite Bow Hanger | Keeps the bow, quiver, and pack in fixed locations |
Before you copy any part of this setup: follow the instructions and compatibility limits supplied by the manufacturers of your saddle, ropes, carabiners, platform, sticks, aiders, and rope devices. Practice the complete sequence at ground level. My setup is what works for me, not a substitute for the manufacturer’s climbing or fall-protection instructions.
The Biggest Lesson After Five Years: Tree Position Controls the Shot
Saddle hunters like to talk about having almost 360 degrees of shooting room. That sounds good until a deer is standing where the tree blocks your bow, your arrow, or the movement you need to draw.
I have learned to choose my position based on the most likely shot before I climb. For a right-handed shooter, I prefer that high-probability lane around my 9 o’clock. A 10 or 11 o’clock lane lets me use more of the tree for cover, but it also puts the trunk closer to the path of the bow and arrow. A left-handed shooter can mirror that idea and favor the 3 o’clock side.
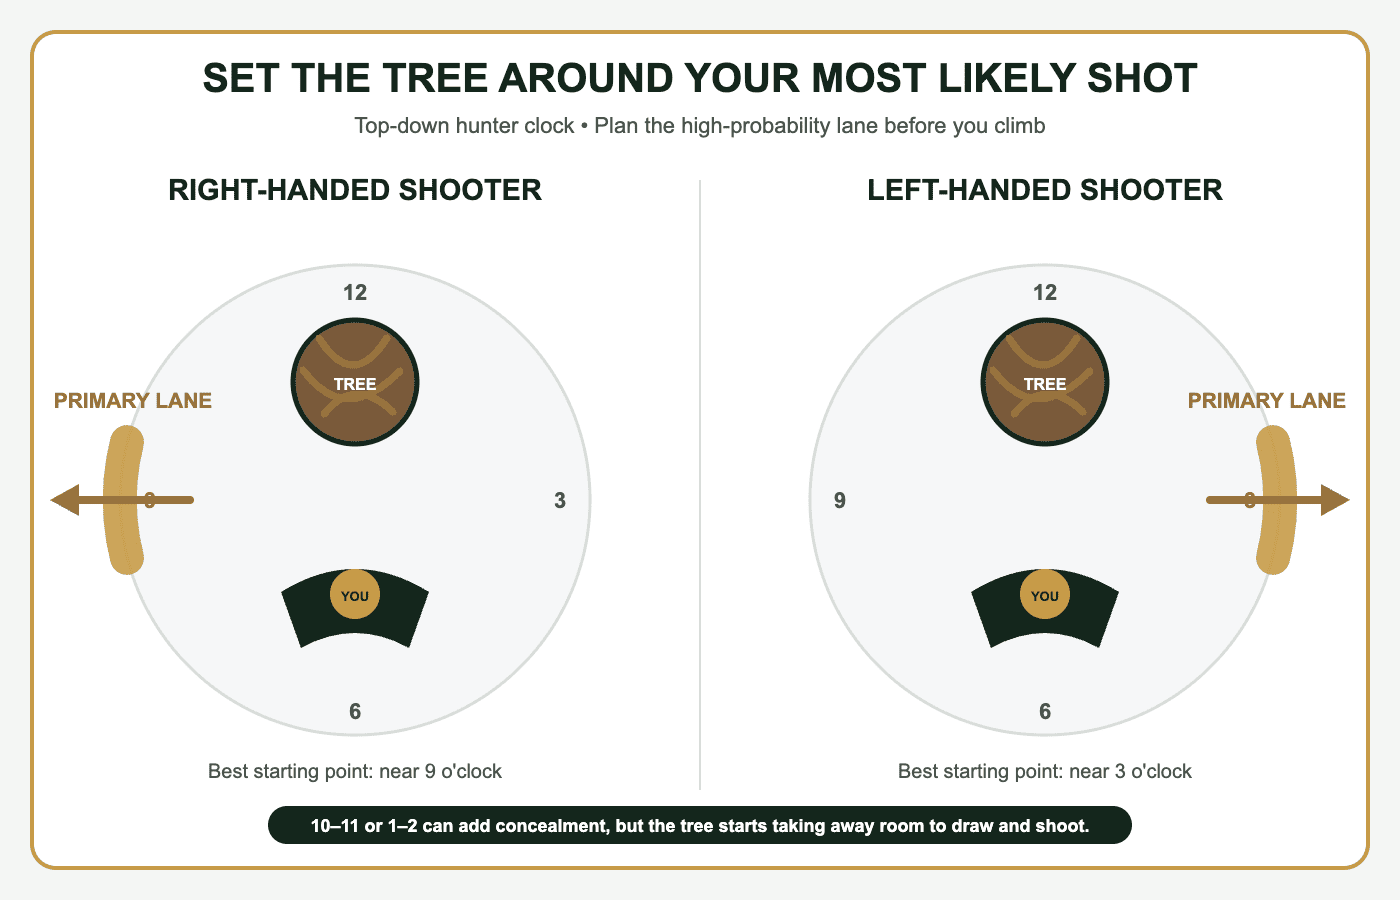
The tree can hide movement, which is one of the advantages of the saddle. It can also force you to lift the bow around the trunk or rotate farther than you planned. That is a lot of movement at bow range. I would rather give up a little concealment and start with a clean strong-side shot than discover the problem with a deer already inside range.
This is also why I practice from the saddle instead of assuming my normal ground form will transfer. Your feet, hips, tether length, platform position, and the angle of the shot all change the draw. My deer shot-placement guide covers the anatomy and angle decision. The saddle adds another problem: you have to reach that shot position without creating unnecessary movement.
Why I Wear My Saddle Into the Woods
I carried a saddle inside my pack once, and I did not like dealing with it at the tree. Wearing it in saves space and removes a step when I am trying to set up quietly. It also keeps the equipment I need first attached to me instead of buried in the pack.
The Latitude Maverick gives me the balance I want. The CRÜZR XC I used before it was a very good and comfortable saddle. I am not moving away from the XC because it failed. The Maverick is simply smaller on my body and fits the lighter system I have built around it.

Every Pouch Has One Mission
I used the large Tethrd Ultralock pouches for a while. They held a lot, but they became too bulky for the way I wanted to hunt. More storage encouraged more gear, and the 11mm ropes still filled too much of the available space.
My current arrangement is much more specific. The Operator Saddle Pouch stays on my left side. My lineman’s rope stays attached to the saddle and feeds into that pouch. The Tactical Dump Pouch stays on my right and carries my tether.
The gear strap, bow holder, releases, rope devices, headlamp, and flashlight also have known locations. I am not stuffing everything into whichever pocket has room. If I reach for something in the dark, it should be where I expect it to be and oriented the way it was when I put it away.
Why I Moved From 11mm Ropes to 8mm
My 11mm ropes were easier to grip, especially when I needed to move the lineman’s rope around the tree. The downside was bulk. They took up a lot of room in the saddle pouches and worked against the smaller setup I was trying to build.
This season I moved to the Tethrd 8mm Tree Tether and Lineman Rope. I use a Ropeman 4 with the 8mm ropes. My older Ropeman 1 devices stay with my thicker 11mm ropes. I treat the rope and adjustment device as a matched system instead of assuming every device works on every rope.
Latitude has also introduced a 7mm rope that interests me, but I have not tested it. I already invested in the 8mm setup, and I am not going to recommend a mechanical device on a smaller rope unless the rope and device manufacturers explicitly approve that combination.
Four Sticks, Aiders, and the Height I Want
I carry four climbing sticks because I am usually trying to get as much useful height as the tree and conditions allow. With a step distance around 17 inches on these systems, the number of sticks and the aider setup make a real difference.
My Tethrd Skeletors use two-step tubular-nylon aiders. That arrangement has worked extremely well for me, and the Skeletors are still my favorite sticks and what I consider the best value I have used. They pack well, attach solidly, and have earned my trust over years of use. My full Tethrd Skeletors review explains that history.
I used the Latitude Carbon SS sticks last season and plan to use them more this season because they cut weight. I put a one-step aider on the first stick. I am not calling them my new favorite yet. Their advantage is weight and how cleanly they fit the Latitude system. The Skeletors still hold the proven-value position.
The Profile Platform Is a 9 Out of 10 for Me
The Latitude Profile platform packs extremely flat, gives me enough working room, and has a leveling adjustment I use to fit different trees. Most of the time, I can get it locked in well enough that it feels solid under me.
It is not a perfect 10 because certain trees can make it move if I do not get the starting position right. I place it flat against the tree, tighten the strap, load the folded platform downward to help seat it, then open and level it. Sometimes I still have to reset it. In my experience, that problem has more to do with the shape and bark of the tree than a repeating failure in the platform.
That is my field process, not a replacement for Latitude’s instructions. A platform that feels wrong at ground level does not become acceptable because you climbed higher.
Ranger 22 or Profile Platform Pocket?
The Latitude Ranger 22 is my primary saddle pack when I want the complete system. It carries the Profile platform and four Carbon SS sticks, and it gives me room for clothing, medical gear, recovery equipment, water, and the other items the hunt requires.
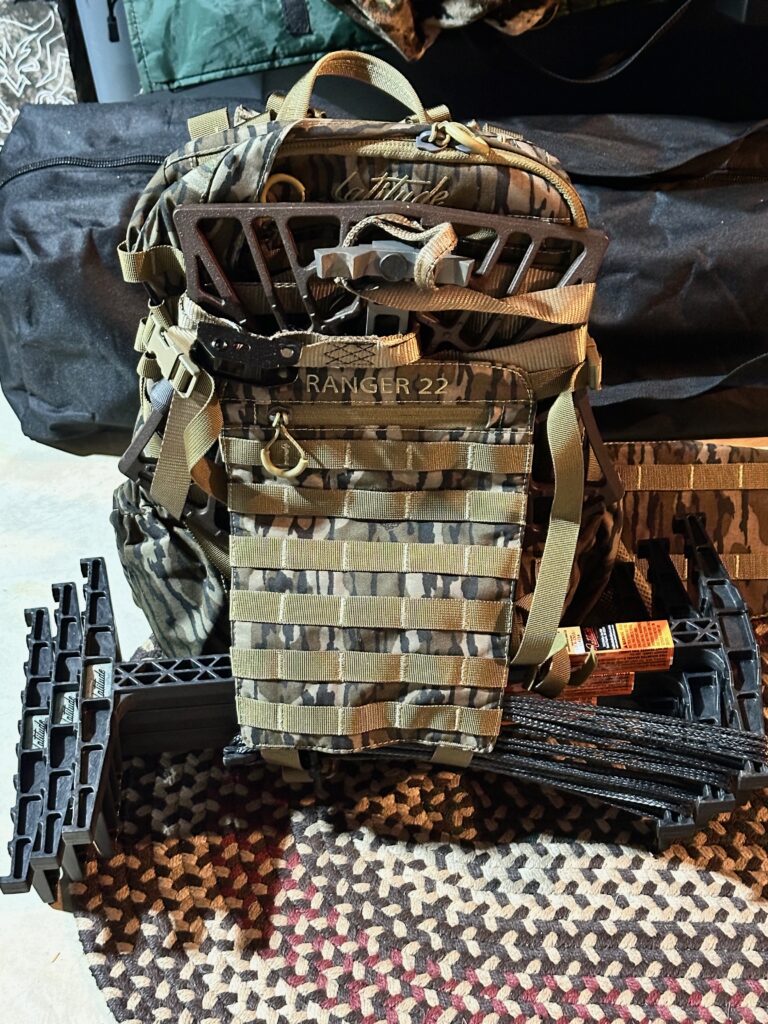
The Profile Platform Pocket serves a different mission. I use it when the stand is close to the truck and I can cut the packout without cutting the safety gear or shot-critical equipment. My saddle pouches already carry the ropes, releases, lights, gear strap, and bow holder I need first.
If I have a longer walk, uncertain weather, or a recovery that could keep me away from the truck, I want the Ranger 22. My saddle-hunting pack guide compares the Ranger with the other packs I have used.
My Setup Sequence in the Tree
The biggest improvement in my saddle system has not been one piece of gear. It has been doing the same things in the same order.
- I establish the platform and remain connected according to my climbing system.
- Once I am on the platform, I install and check the tether before I remove the lineman’s connection.
- I normally set my tether around nose height as a personal reference, then place the gear strap about four inches above it.
- I keep both connections while arranging the strap because it helps me stay tight to the tree.
- I hang the pack at a height where I can reach into it without fighting it.
- I raise the bow with the hoist, secure the bow on my left, remove the quiver, and hang the quiver on my right.
- I nock an arrow when I am ready to hunt and place my primary release on the bow’s D-loop.
The exact measurements are not rules for another hunter. Body size, saddle geometry, bridge length, tree diameter, equipment instructions, and shooting side all matter. The point is to build a sequence you can repeat and verify instead of improvising fifteen feet off the ground.
The Gear Strap, Bow Holder, and Hoist Complete the System
The Latitude Gear Strap lets me put the pack, quiver, and other equipment at known locations. Its hanging strap also lets me adjust the pack to a useful height. The Bite Bow Hanger locks into that strap and gives the bow a secure position within a level reach.
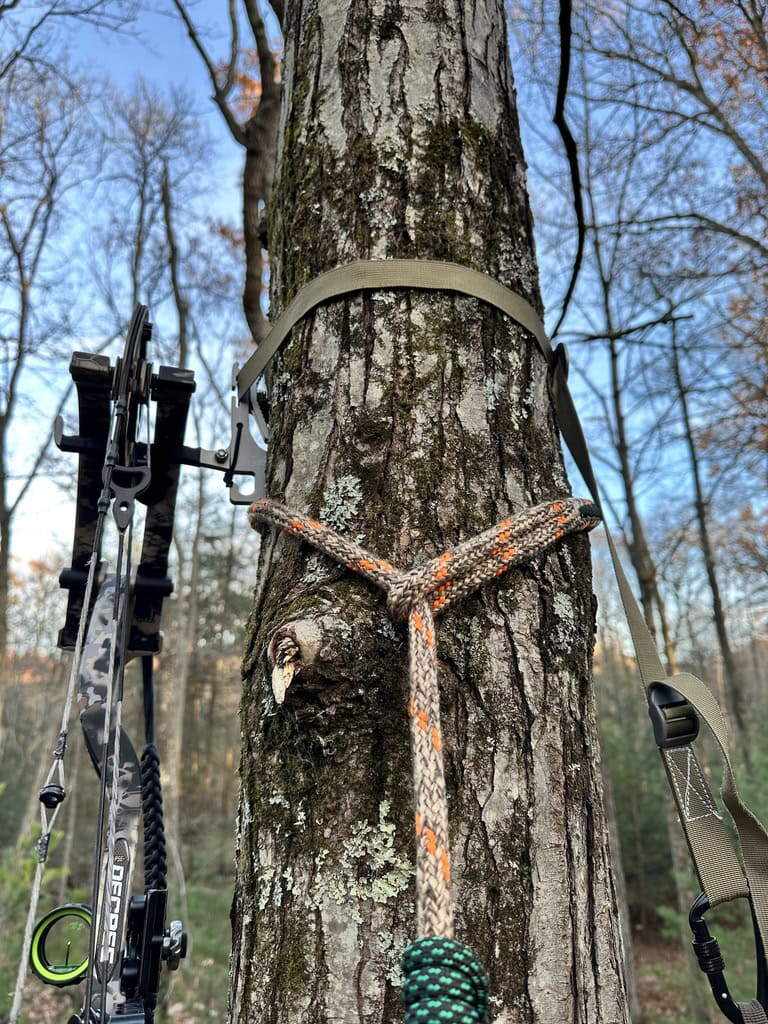
I used to attach the bow to my backpack and climb with both. I now wear the pack during the climb and use the Doyle’s Deer Gear Huntin Hoist to bring the bow up after I am set. It clips to my belt or pack, pays out while I climb, and keeps the bow out of the climbing sequence.
My Release Is Never Buried in the Pack
I only hunt with four-finger handheld releases. I have used the Tru-Fire Edge 4-Finger for years and trust it in my hunting setup. I am also starting to use a four-finger STAN OnneX Clicker Thumb, but I am not using the click as part of my shot process right now.
Once the bow is ready, the primary release goes on the D-loop. A backup release stays in a known pouch or pack pocket because I have dropped a release out of the tree before. A release is too important to let one mistake end the hunt.
What I Changed Over Five Years
| What changed | Why I changed it | What I use now |
|---|---|---|
| Saddle carried in the pack | Added another task at the tree and used pack space | I wear the Maverick in |
| Large Ultralock pouches | Too bulky for the compact system I wanted | Operator pouch left, dump pouch right |
| 11mm ropes for every hunt | Great grip but took up too much pouch space | 8mm ropes with Ropeman 4 devices |
| Bow attached to the backpack | Added the bow to the climbing load | Doyle’s retractable hoist |
| Gear placed wherever it fit | Created searching and extra movement in the dark | Fixed pouch and tree locations |
| Tree chosen mostly for cover | The trunk could block the highest-probability shot | Plan the strong-side lane before climbing |
The pattern is simple. I kept removing steps that created weight, wasted movement, or uncertainty. That is the same reason I approach the final part of an entry as a low-signature problem. My Last 200 Yards system covers the approach, while Mike’s Rules explains the larger discipline behind repeatable decisions.
Is Saddle Hunting Worth It?
For a mobile bowhunter who needs to react to sign, hunt imperfect trees, and reduce the weight of a traditional stand, yes, saddle hunting can be worth it. It is worth it for me because it solves those problems and because I have put five seasons into making the system repeatable.
Best for: A hunter who values mobility, is willing to practice at ground level, and wants to build a consistent climbing and shooting process.
Skip it if: You are uncomfortable managing ropes, do not want to practice shots from the actual hunting position, or would be better served by a preset stand in a known tree. A saddle does not automatically make the setup lighter, safer, faster, or more effective. The complete system and the person using it decide that.
System role: The saddle is the mobile shooting position. The sticks get me to height, the platform controls my feet, the ropes keep me connected, and the pouches and tree strap keep critical equipment where I expect it. None of those parts can cover for a bad tree choice or a shot lane I did not plan.
If you are building your own system, start with the mission and the shooting position before buying accessories. Then compare the packs I have tested, review my complete current gear list, and practice every connection and movement close to the ground until the order becomes automatic.
Want to see exactly what I’m carrying this season? Check out my Personal Bowhunting Gear List for 2026