
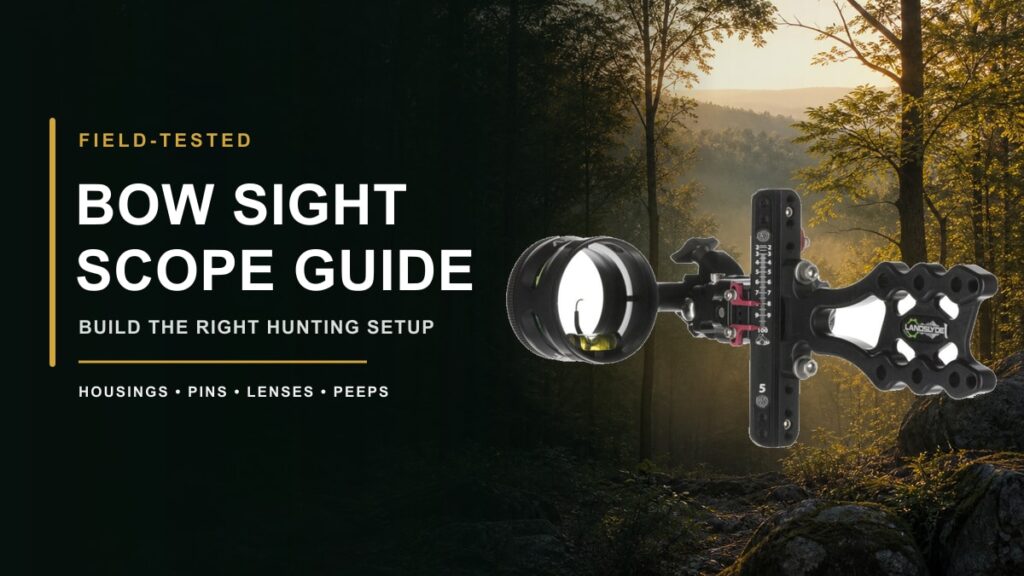
When I bought my Axcel Landslyde, I thought the hard decision was over. Then I started looking at scope housings, pins, lenses, retainers, peeps, clarifiers, sunshades, and all the little parts that are supposed to make them work together.
I could find plenty of product pages. What I could not find was one practical guide that explained what I could change, what fit my sight, and what would actually improve a hunting setup. That was the problem I was trying to solve.
So I built the system, tested it, changed what did not work, and hunted with it. I ran my Landslyde with an AVX-41 scope, a 4x lens, and an aftermarket sunshade through a full season. This is the guide I wish I had before I started buying parts.
My Setup and the Bottom Line
- Sight: Axcel Landslyde single-pin slider
- Scope: Axcel AVX-41
- Aiming point: Single vertical pin
- Lens: 4x magnification
- Glare control: Aftermarket sunshade
- System role: A clean, more defined sight picture for whitetail hunting without turning my bow into a target rig
My verdict: The 4x lens is the sweet spot for me. It gives me more target definition, but I can still find the pin and settle into the shot like I expect to on a hunting bow. The aftermarket lens and shade saved money and held up through the season. I still want proven hardware anywhere a failure could move the scope or change zero.

What Can You Customize on a Bow Sight Scope?
The bow sight is the complete aiming unit attached to the bow. The scope is the round housing you look through. Depending on the system, that housing can hold a pin, several pins, a dot, a lens, a level, a light, and different shades or covers.
| Part | What it changes | Reason to change it |
|---|---|---|
| Housing | The size and frame of the sight picture | You want a larger view, different accessory system, or a better peep match |
| Pin or cartridge | The aiming references you see | You want one pin, multiple references, a smaller fiber, or a dot |
| Lens | Target magnification and definition | You want to see a smaller aiming spot more clearly |
| Peep insert | How much light enters and how the housing centers | The scope looks too large, too small, dark, or difficult to center |
| Clarifier or verifier | Target or pin focus | Your eye cannot keep the correct part of the picture clear |
| Sunshade | Glare and side light | Direct light washes across the lens or pin |
| Rheostat or light | Pin brightness | The fiber is blooming or disappearing as light changes |
Start with the problem you are trying to solve. A scope does not get better because it has more parts hanging on it. Every addition should improve the picture you see at full draw.
Think of the Scope as an Optical System
The housing, lens, peep, pin, and your eye all affect one another. That is why copying somebody else’s parts list can still leave you with a dark or blurry picture.
- The sight positions the scope. The slider, mounting bar, windage, elevation, locks, and sight tape move the point of impact.
- The scope builds the picture. The housing, pin, lens, bubble, shade, and light control what you see.
- The peep frames it. Peep size and the distance between your eye and scope decide how naturally the housing centers.
- Your eye finishes the system. Two hunters can look through the same lens and need different focus help.
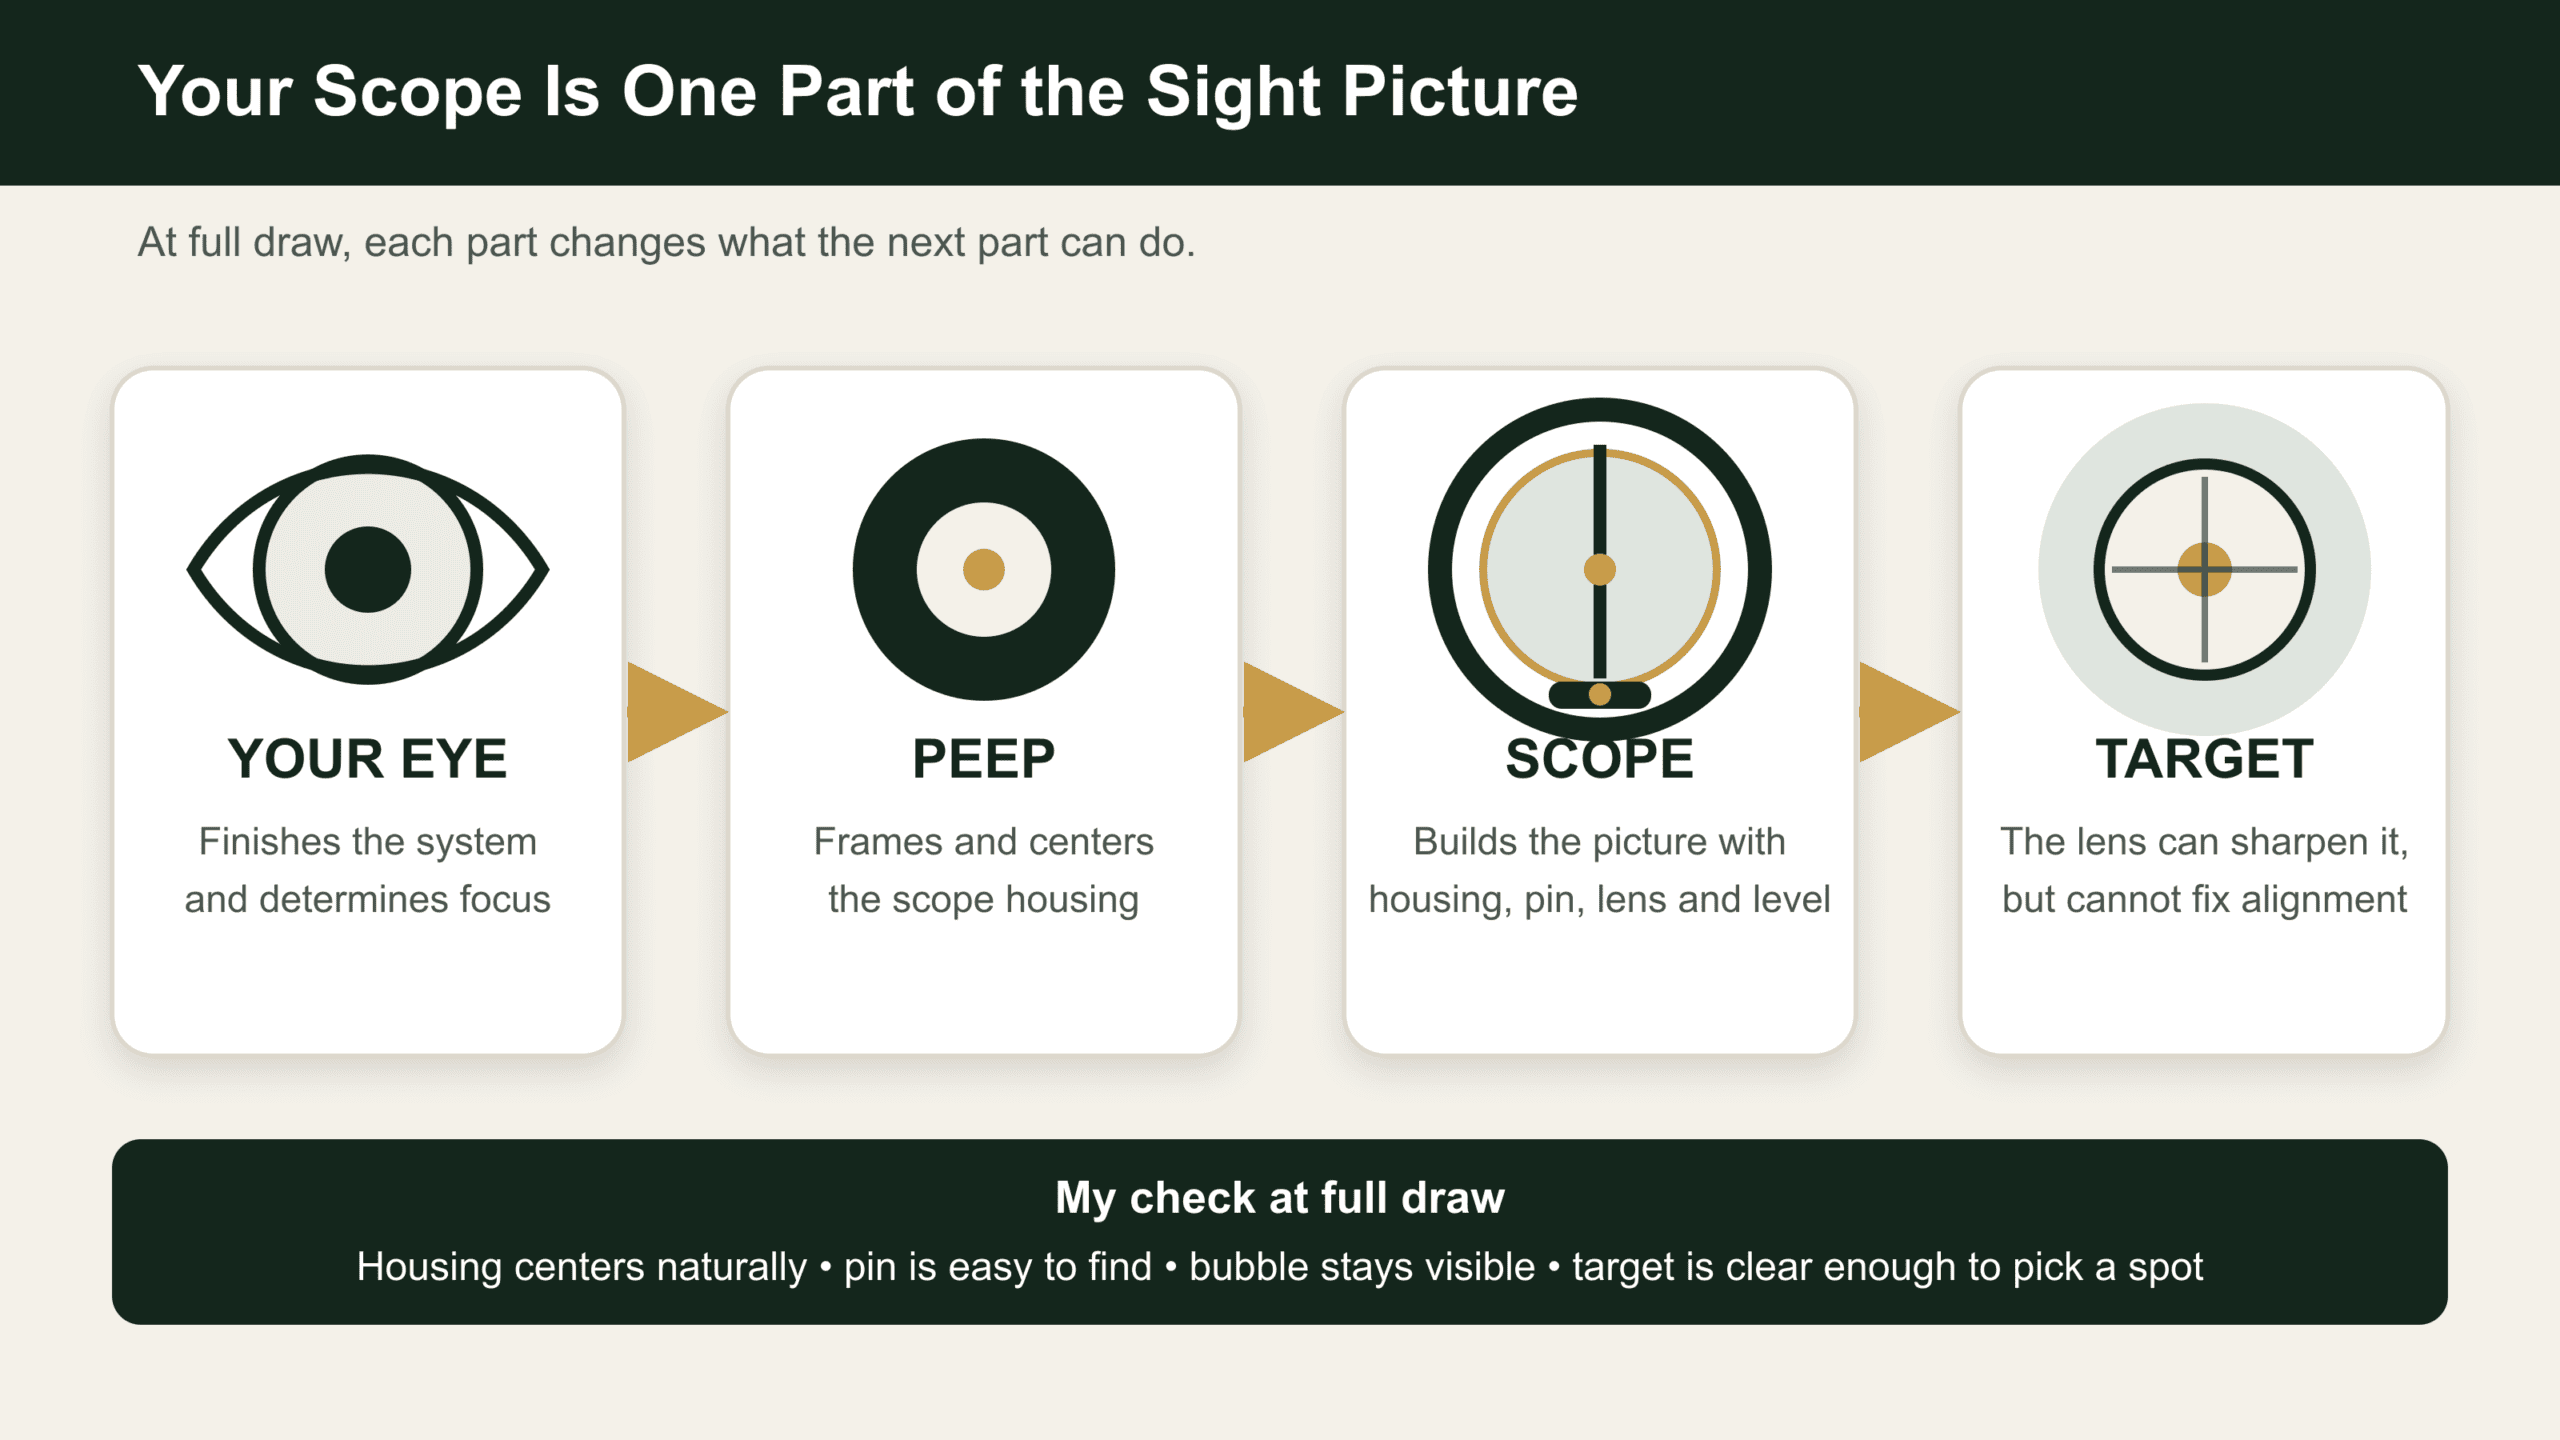
At full draw, I want the outside edge of the housing to center naturally inside my peep. I also want the pin easy to find, the bubble visible without stealing my focus, and the target clear enough that I can pick the spot I intend to hit.
If the basic terms are new, my compound bow parts guide shows where the sight fits into the rest of the bow. This page takes over once you are ready to customize the scope itself.
My Axcel Landslyde and AVX-41 Build
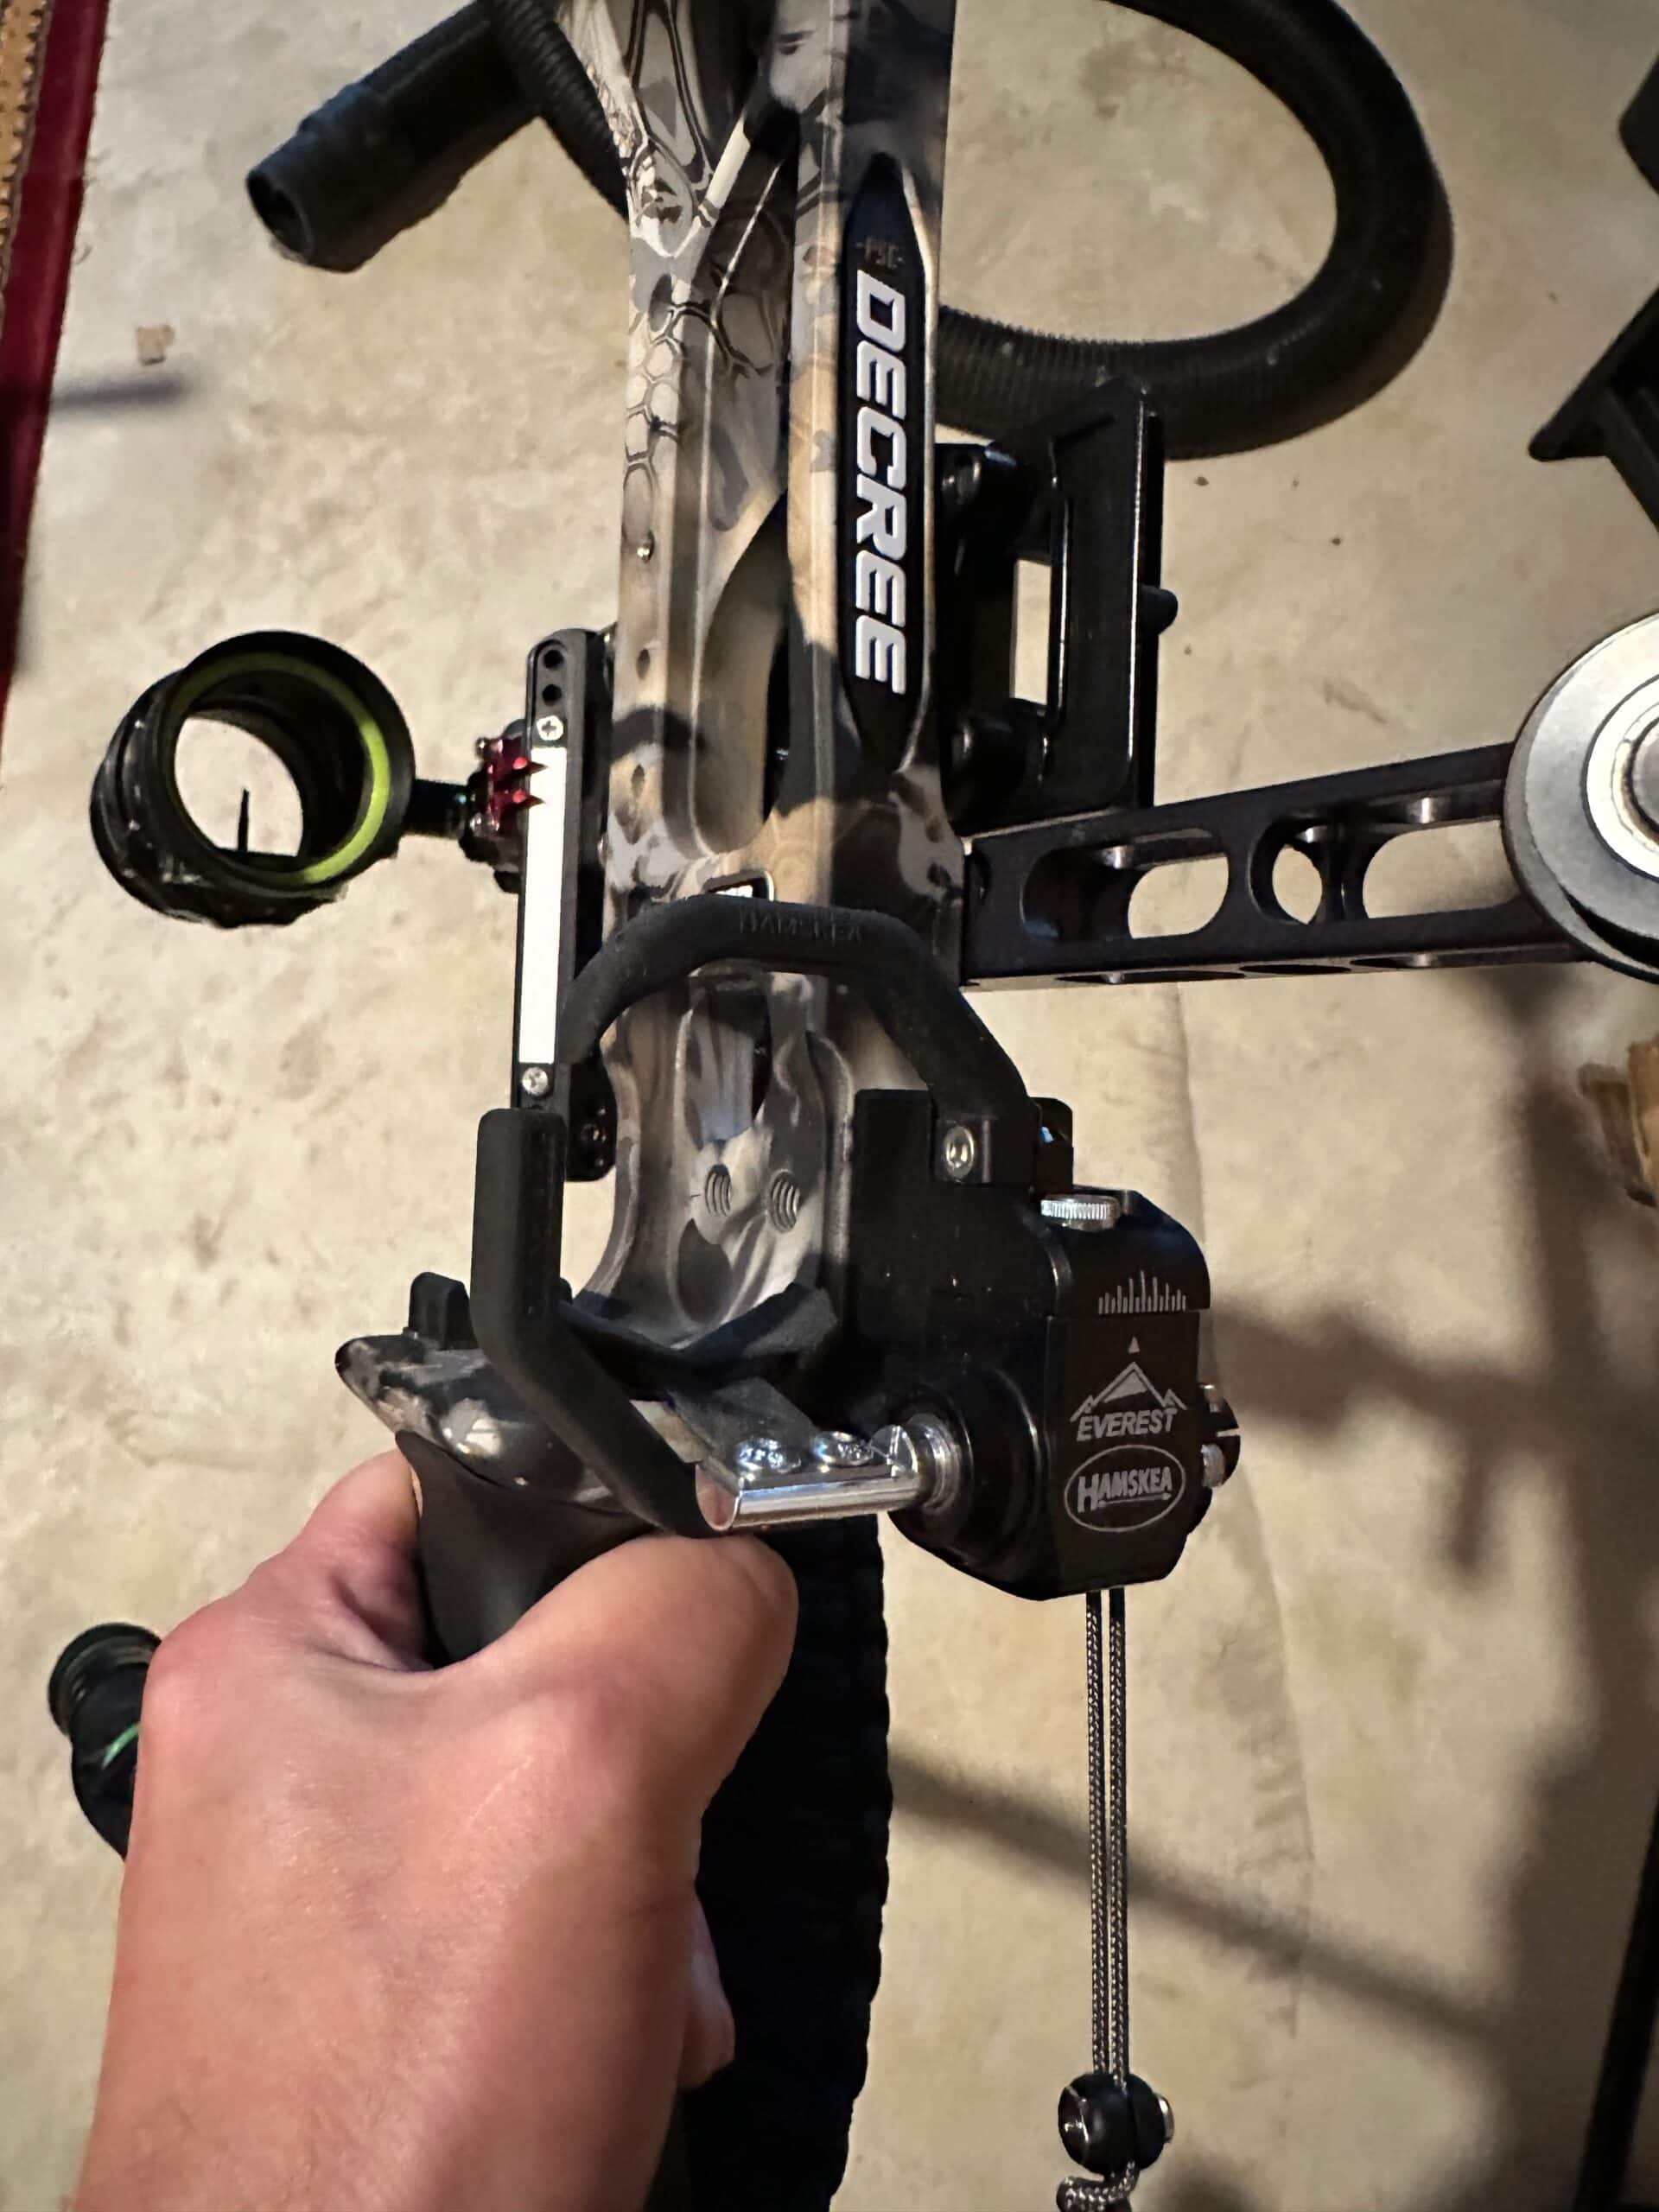
The Landslyde handles the movement and adjustment. The AVX-41 is the modular housing that builds the sight picture. I already liked the way the Landslyde worked as a single-pin slider, so it made sense to improve the scope I had instead of replacing the entire sight.
Current value baseline: As of September 2, 2026, Lancaster lists the complete Landslyde with an AVX-41 and .019 single pin at a regular price of $374.99. That is the number I would use when deciding whether to buy the complete system or upgrade a sight I already own. Current prices and availability can change, so check the product page before ordering.
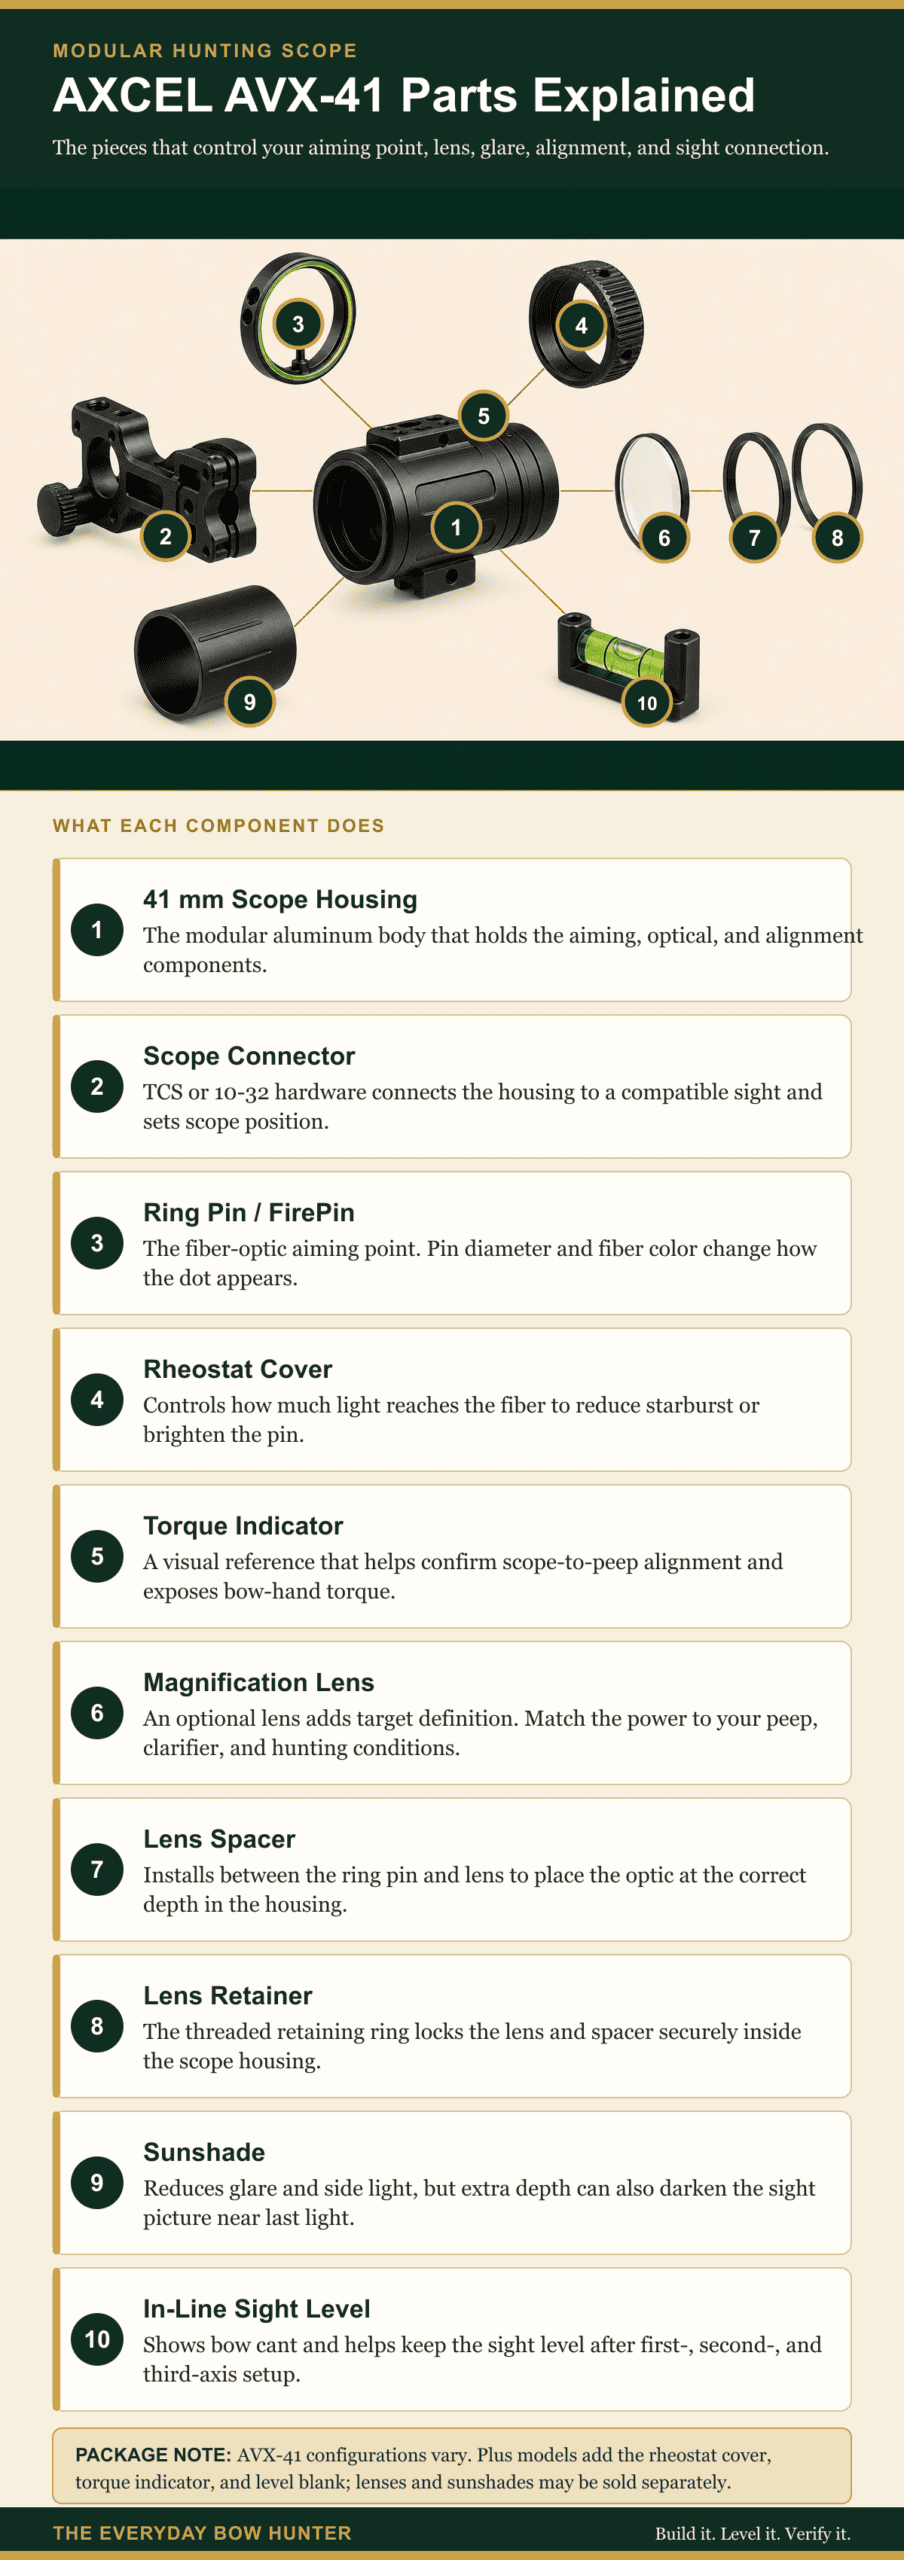
The first thing I learned is that AVX-41 packages do not all arrive with the same parts. Before ordering anything, take the scope apart far enough to inventory the ring pin, lens spacer, retainer, level, shades, and any external spacer already included. It is easy to buy a second piece of hardware you already own.
| AVX-41 part | Job | When it makes sense |
|---|---|---|
| Ring pin | Provides the fiber-optic aiming point | You want a clean hunting pin in the size and color you see best |
| Rheostat cover | Controls how much fiber is exposed | The pin blooms in bright light or disappears when conditions change |
| Lens spacer and retainer | Positions and secures the lens | Your package did not include the hardware required for a lens |
| External spacer | Supports certain lens-only builds | You are building a dot or etched-lens system without the ring pin |
| Shade | Reduces glare and makes incoming light more consistent | Direct or side light washes out the lens |
| Torque indicator | Adds another scope-centering reference | You need help seeing a small change in peep-to-scope alignment |
My build stayed simple: one vertical pin, a 4x lens, and a shade. I leveled all three axes, zeroed the sight, and tested it from hunting positions. Once it worked, I stopped changing it.
How the AVX-41 Lens Hardware Goes Together
On the AVX-41 ring-pin setup, the lens spacer belongs between the ring-pin retainer and the lens. The lens retainer then secures the lens. Follow the current Axcel instructions for your exact package, because the order and required pieces matter.
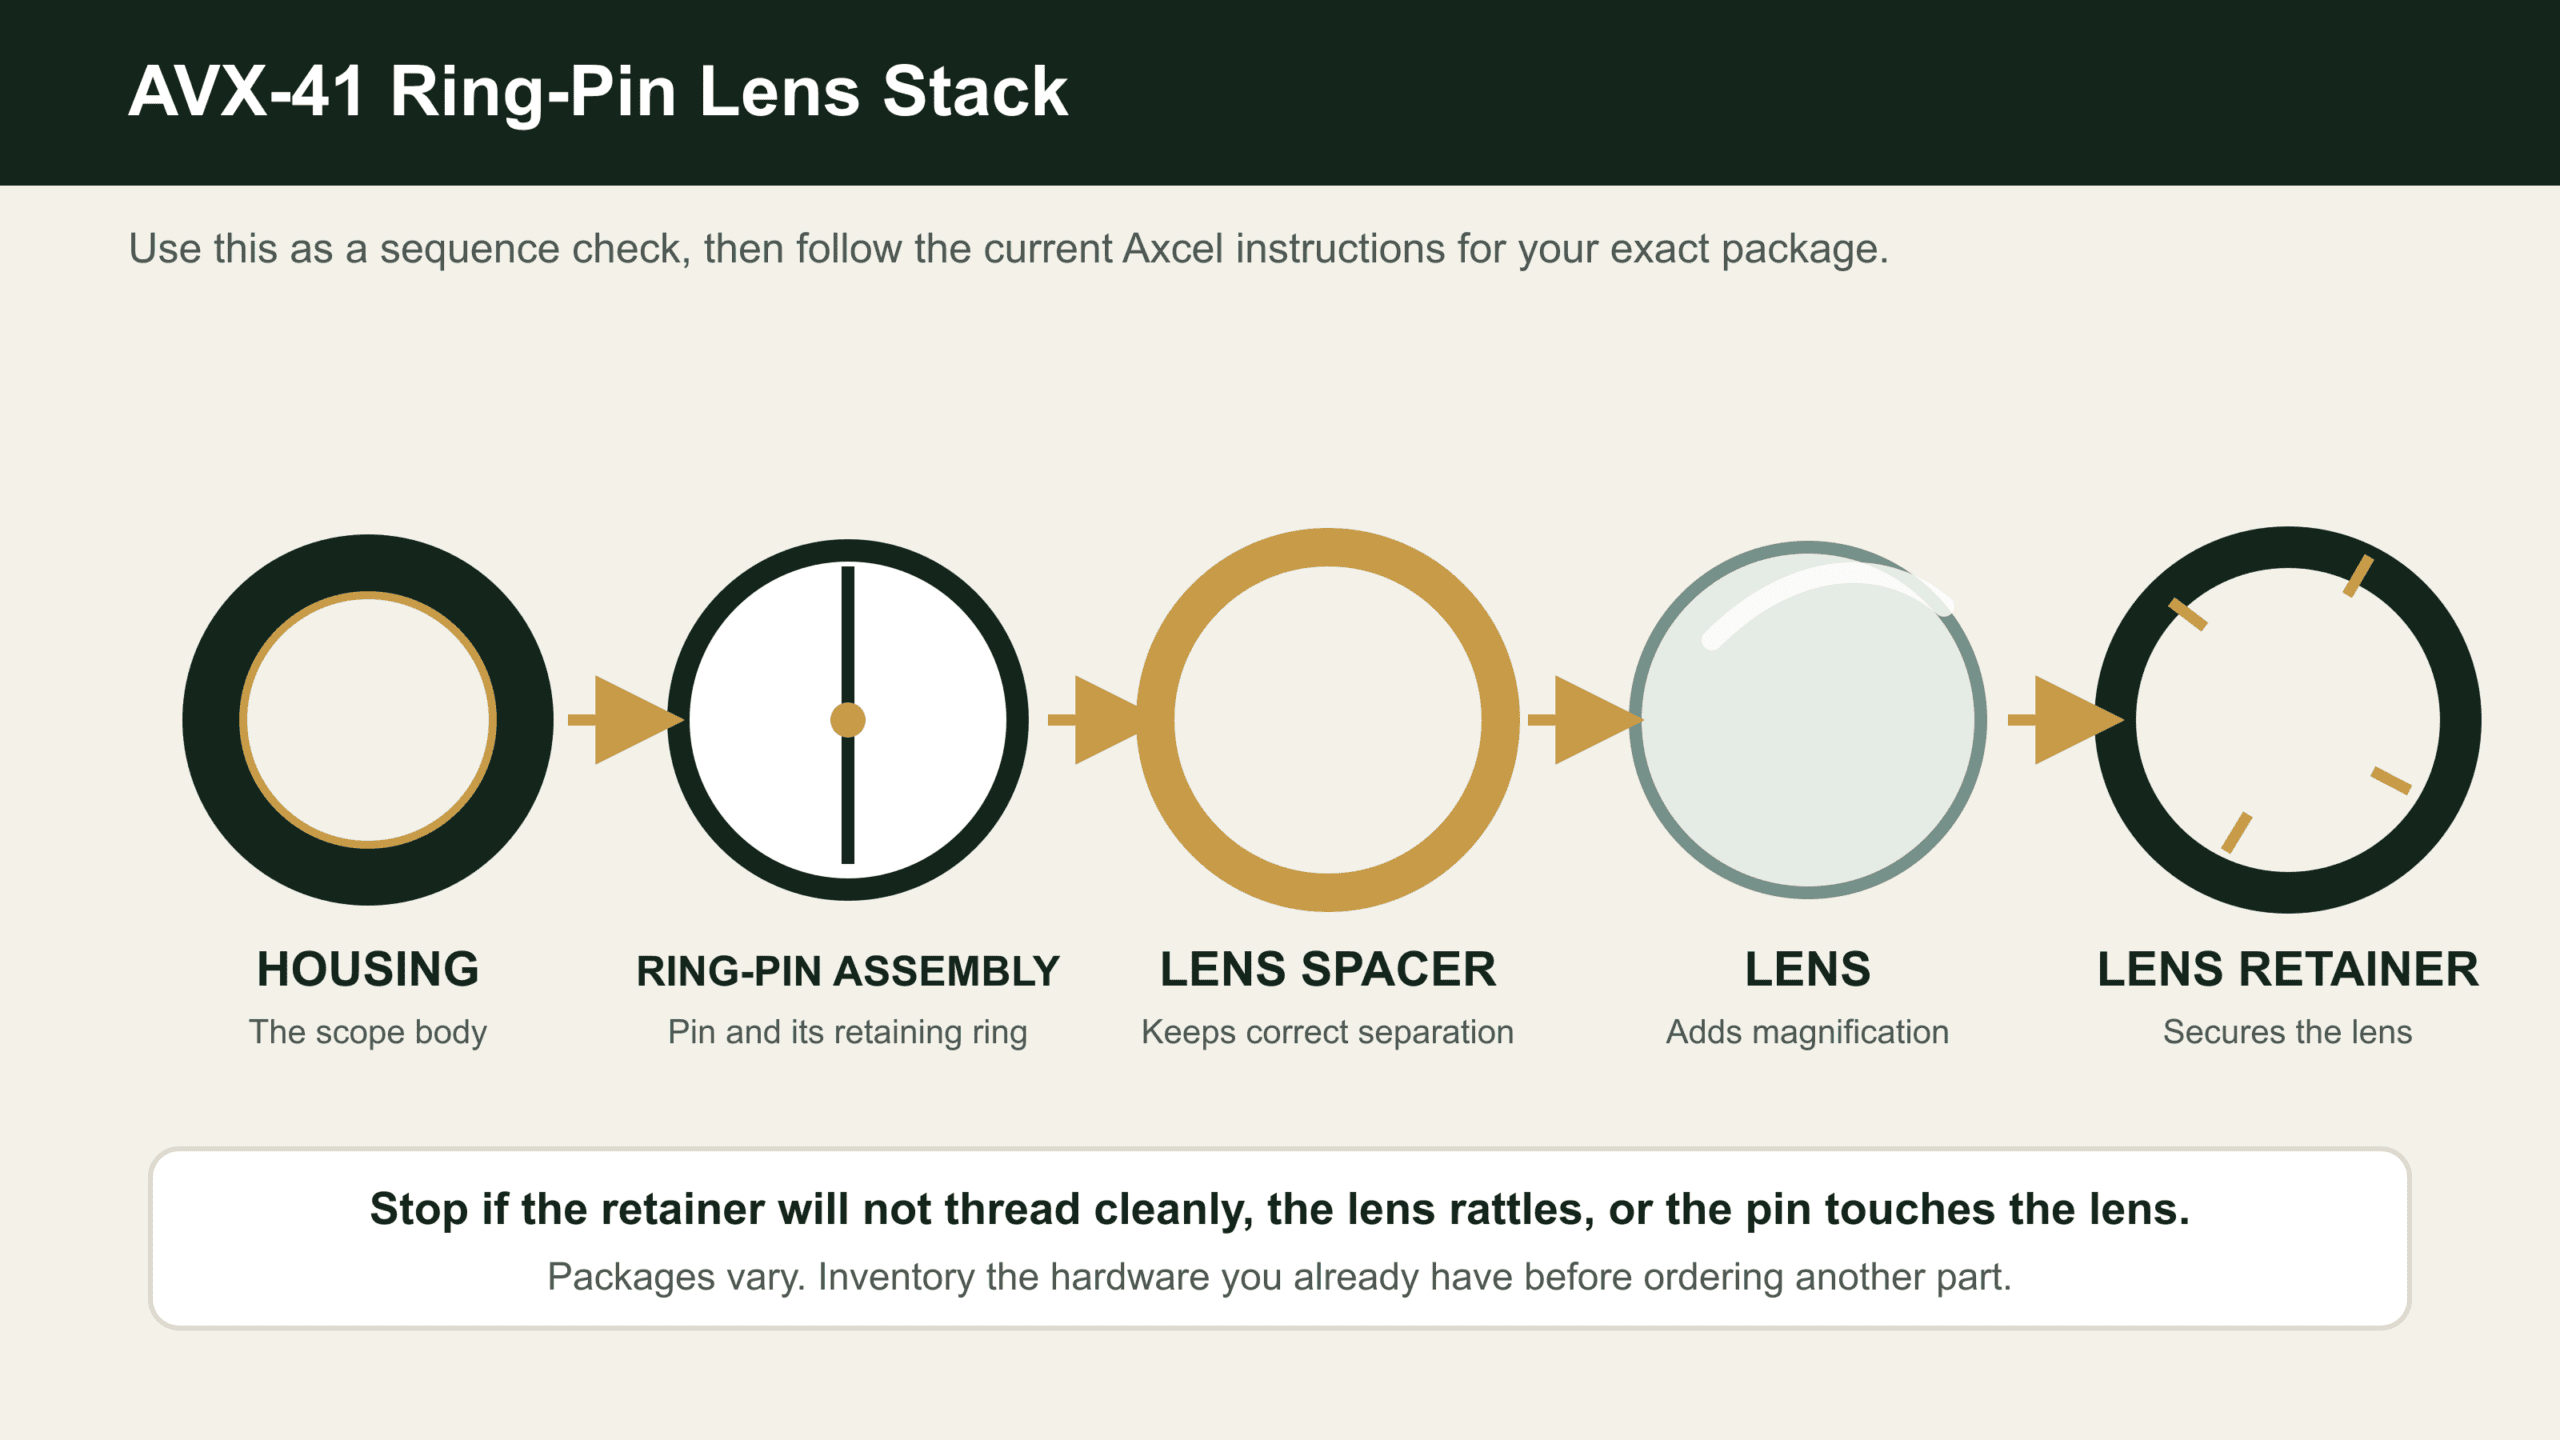
Do not force a retainer that does not thread cleanly. If the lens rattles, the retainer will not seat, or the pin and lens touch, stop and verify the spacer and package before shooting.
Can You Put an ULTRAVIEW Scope on an Axcel Landslyde?
Yes, with the correct parts. The UV3 and UV3XL use removable cartridges, which can be useful if you want to change pin or lens configurations without rebuilding the entire housing. The important part is the connection between the UV scope and your Axcel sight.
ULTRAVIEW sells scope rods in several diameters and provides a compatibility chart. Select the exact rod listed for your sight. Do not order a UV hunting scope and assume whatever rod is included will fit the Landslyde.
- Choose the UV3 or UV3XL housing that fits the kind of shooting you do.
- Use ULTRAVIEW’s current compatibility chart to select the rod for the Axcel sight.
- Choose a cartridge that fits that exact UV housing and accepts the pin or lens layout you want.
- Mount the complete system, then level and re-zero the sight.
ULTRAVIEW is not automatically better than the AVX-41. It is another path. If you already own a Landslyde with an AVX-41 and only want magnification or glare control, the Axcel path is usually more direct. If fast cartridge changes are the main reason you are customizing, the UV system has a real advantage.
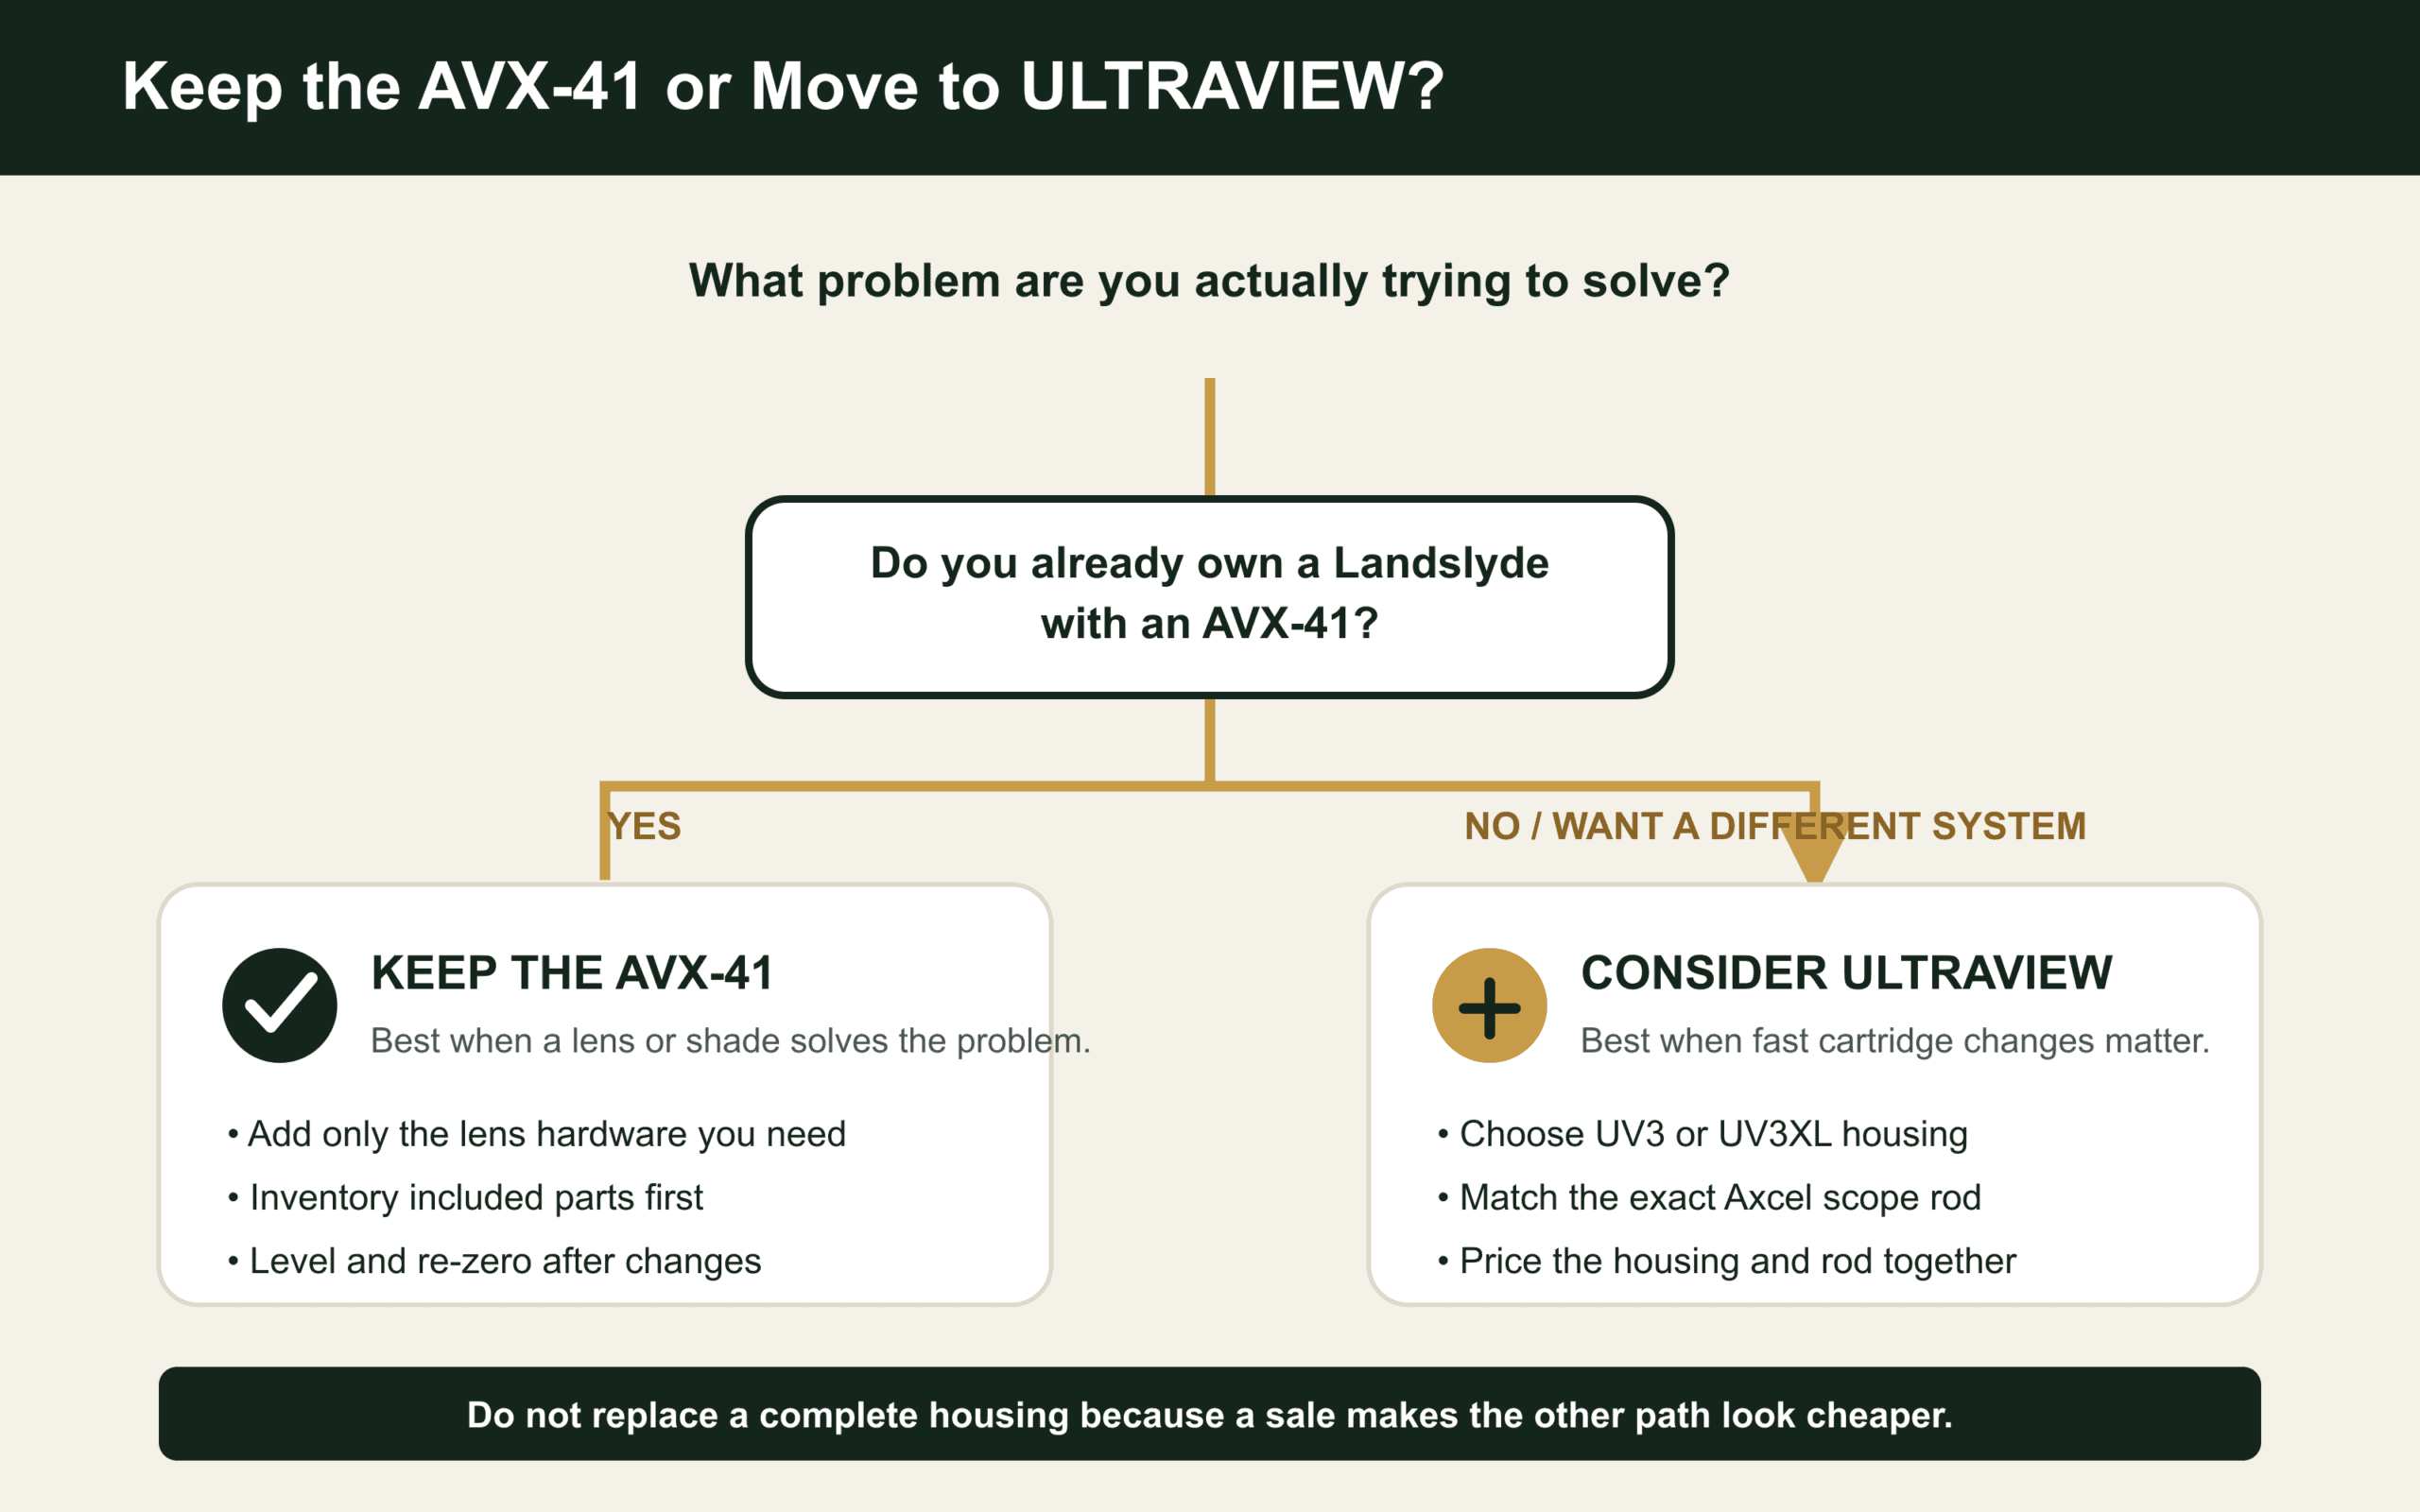
Current value baseline: ULTRAVIEW lists the UV hunting scope at a manufacturer MSRP of $199.99 and showed a $129.99 sale price on September 2, 2026. The scope rod was another $29.99. Compare the full $229.98 scope-and-rod baseline with the cost of the AVX-41 parts you actually need. A sale should not push you into changing housings when a lens and shade solve the problem.
Choosing Bow Sight Lens Power
A magnified lens makes the target look larger. It also makes your pin movement look larger. The lens did not create the movement, but seeing more of it can change how you aim. Some hunters settle in better. Others start fighting the pin.
| Lens | Best fit | Hunting tradeoff |
|---|---|---|
| 0x | Lens protection or an etched reference without magnification | No added target definition |
| 2x | A mild increase in definition | The difference may not feel large to every eye |
| 4x | Hunting and 3D use when you want a clear but manageable increase | Peep size and focus may need more attention |
| 6x | Longer practice or target work | More visible movement and tighter alignment |
| 8x | A dedicated target system | More magnification than I want on a whitetail bow |
For me, 4x is the answer. I get more definition without losing the feel of a hunting sight. I would not tell a new bowhunter to start there just because it works for me. Prove your anchor, peep alignment, and shot process first. Add magnification when you can name what it needs to improve.
Clarifier or Verifier?
These are not two strengths of the same product. They solve different focus problems.
- Use a clarifier when: A magnified scope lens makes the target blurry. The clarifier works with the scope lens to sharpen the target image.
- Use a verifier when: Your near focus has changed and the sight pin is blurry. A verifier does not clear the distant target.
- Check alignment first when: The picture is dark, shadowed, or cut off on one side. Peep size, anchor, housing position, and shade length may be the real problem.
Your eye decides the final combination. If both the pin and target look wrong, test the parts at full draw with a qualified pro shop instead of buying clarifiers by color and hoping one works.
OEM Versus Aftermarket Scope Parts
eBay was one of the most useful places I found when I built my scope. I bought an aftermarket 4x lens and sunshade for much less than the OEM route. They fit, stayed tight, and made it through a full hunting season.
That does not mean every aftermarket part is equal. I am willing to compare lenses, shades, caps, and other non-structural parts after checking the measurements. I am much more conservative with the mounting bar, scope rod, locks, retainer system, and anything else that could move the scope or change zero.
| Buying path | Why it can work | What to verify |
|---|---|---|
| OEM | Known fit, instructions, and manufacturer support | Your exact model and what the package already includes |
| Aftermarket | Lower price and more choices | Exact housing, dimensions, threads, optical quality, seller history, and return policy |
| Used | Can lower the cost of a premium sight or housing | Bent rods, damaged threads, scratched lenses, worn locks, and missing retainers |
My season with one aftermarket lens and shade is evidence that those specific parts worked. It is not proof that every listing is good. Read the description, match the model, and ask for exact measurements when the listing is vague.
Install the Scope in This Order
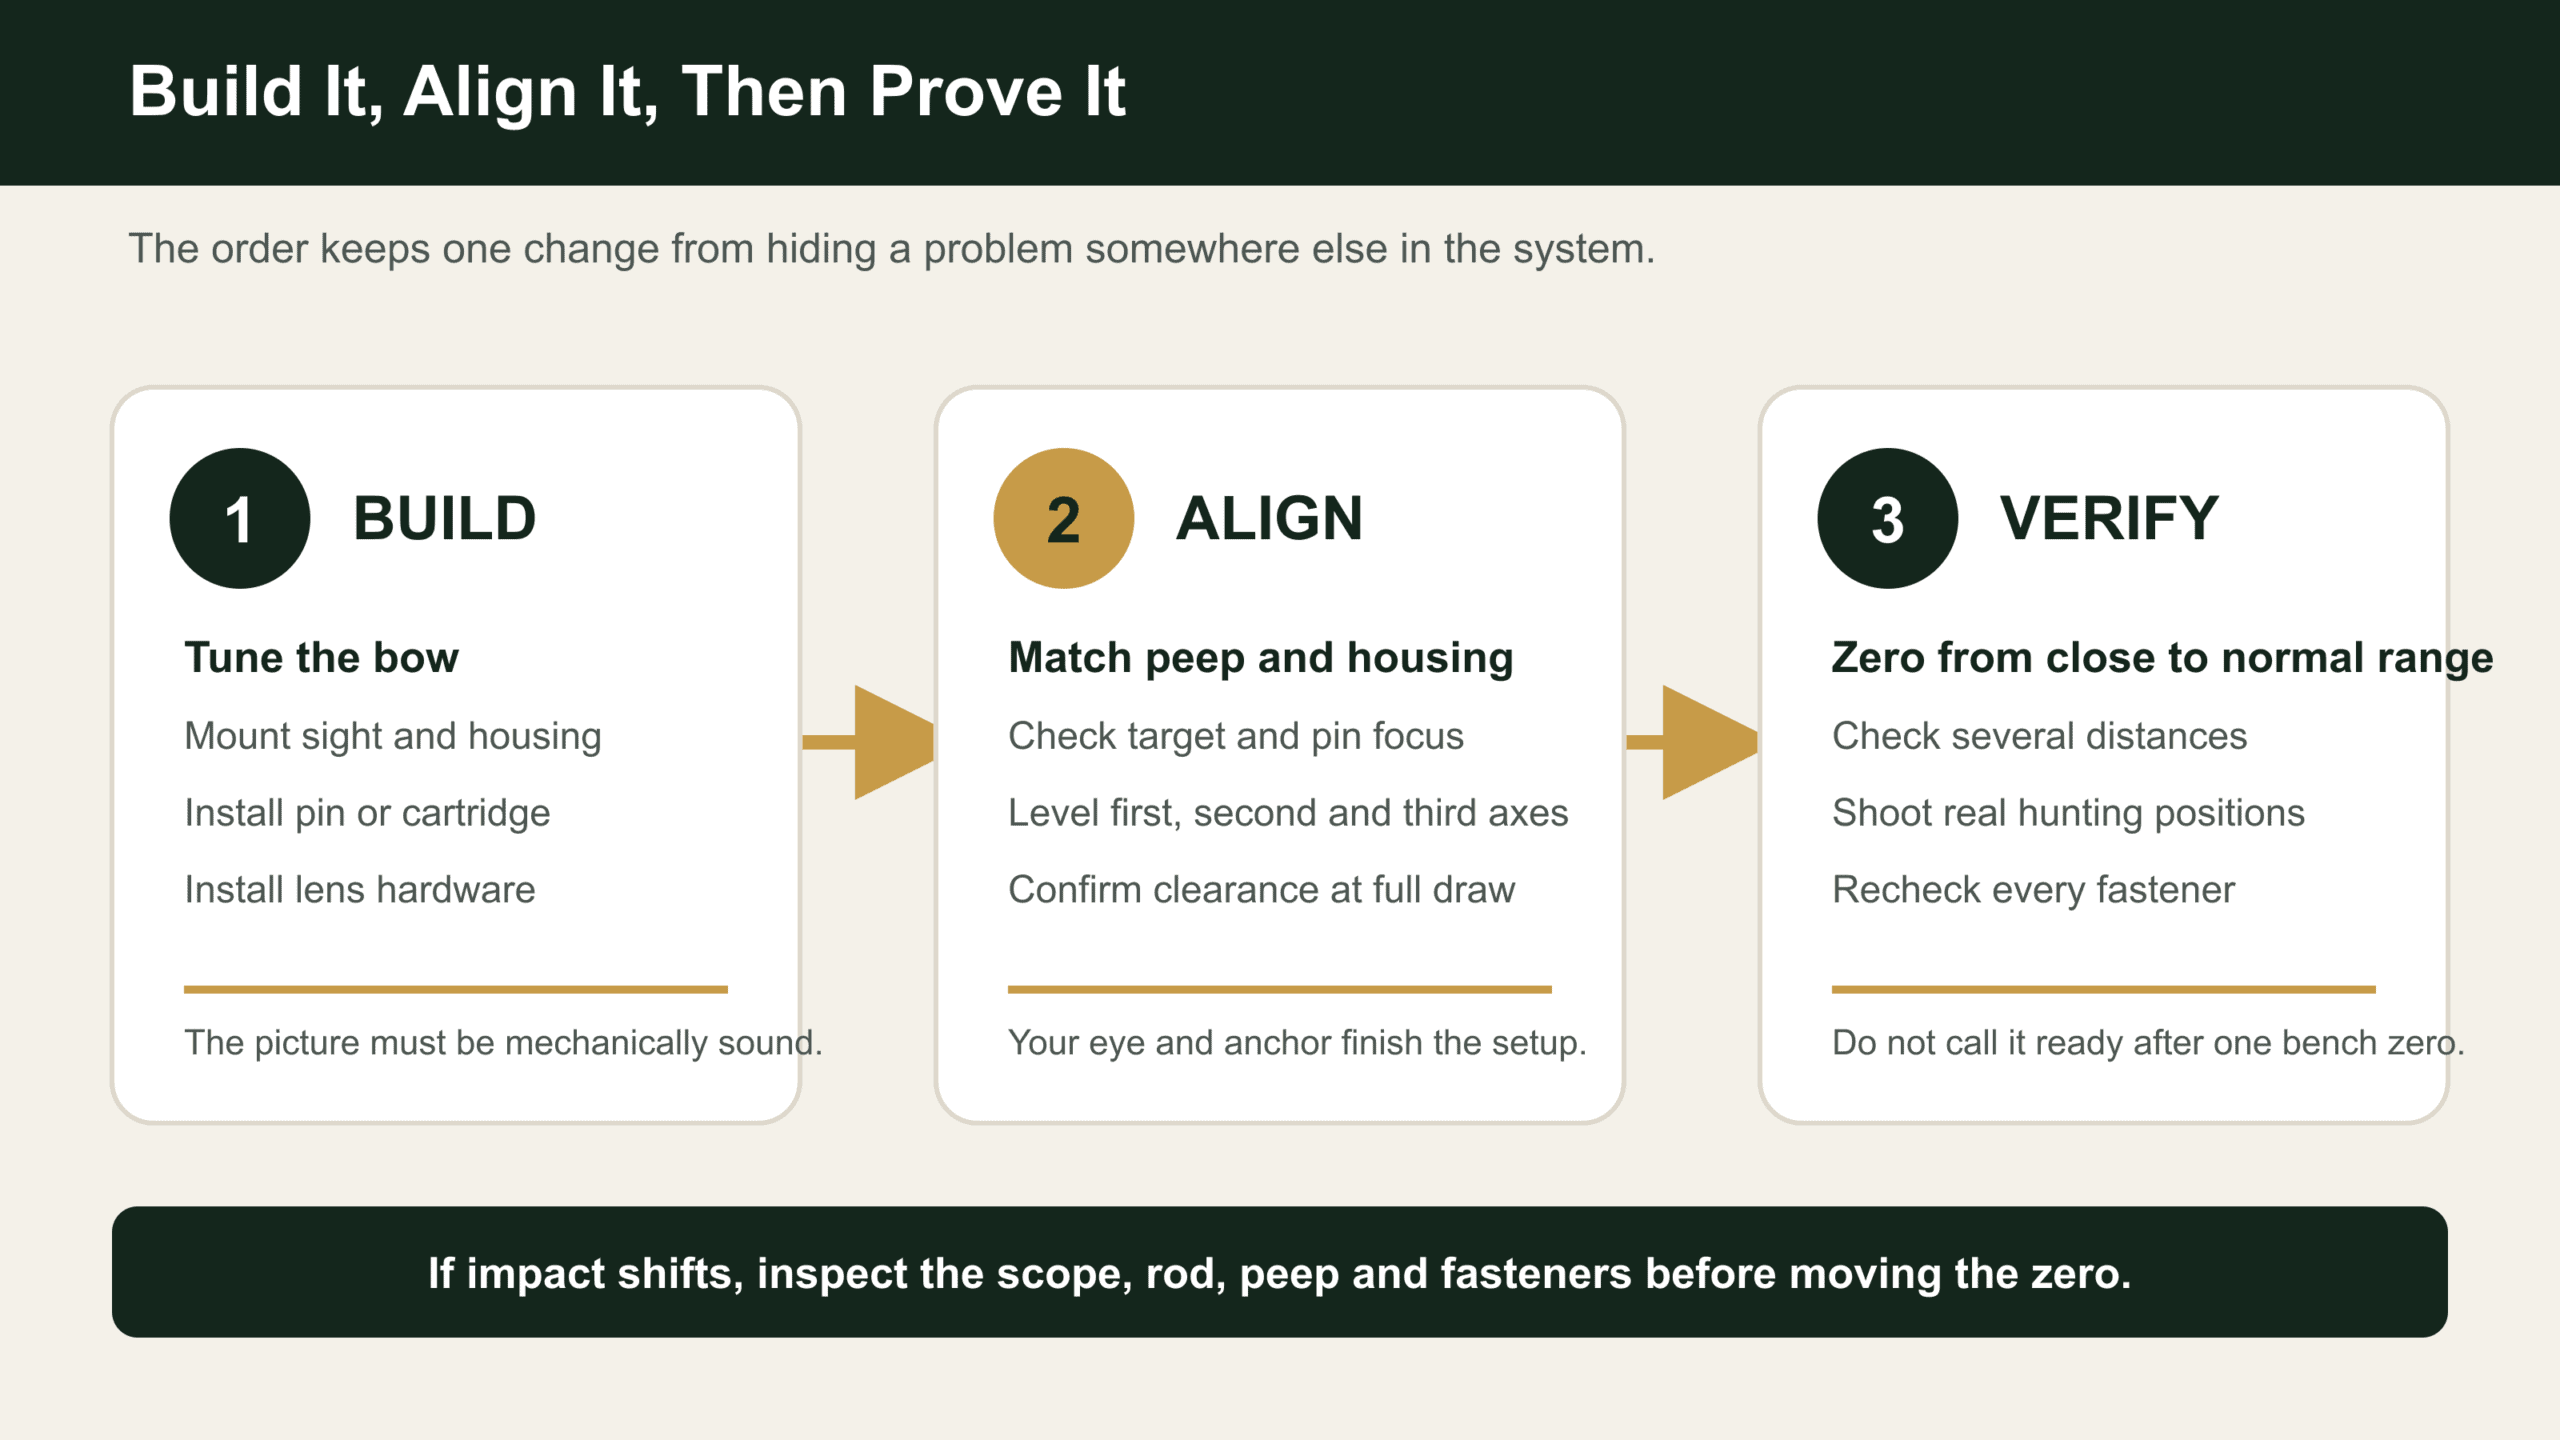
- Tune the bow first. A lens cannot fix a bow or arrow setup that will not repeat.
- Mount the sight and housing. Confirm the rod, threads, hardware, and clearance.
- Install the pin or cartridge. Check the aiming point and brightness before adding the lens.
- Install the lens correctly. Use the proper spacer and retainer. Keep grit and fingerprints off the lens.
- Match the peep and focus. Test a clarifier or verifier only when your eye needs it.
- Level all three axes. Do this before trusting the bubble or building a final sight tape.
- Zero the sight. Start close, move to your normal zero, and verify several distances.
- Shoot realistic positions. Test from elevation, kneeling, leaning, and the angles you expect in the woods.
- Recheck every fastener. Inspect the system after the first full range session and before hunting.
My bow sight leveling guide covers the first, second, and third axes. After that, I use my 25-yard zero as the starting point for the hunting system.
Bow Sight Scope Troubleshooting
| Problem | Check first |
|---|---|
| Target is blurry after adding magnification | Test a compatible clarifier with the same lens at full draw |
| Pin is blurry | Test whether a verifier fits your near-focus problem |
| Picture is dark | Remove the shade, check peep size, then confirm housing alignment |
| Housing will not center | Confirm anchor and draw length before moving the peep or sight bar |
| Pin movement looks worse | Stop forcing the pin and compare 2x or no magnification |
| Glare or flare | Clean the lens correctly, then test a compatible shade |
| Impact shifted | Inspect the scope, rod, peep, and every fastener before re-zeroing |
| Buzzing or vibration | Check the retainer, shade, level, and scope connection |
If the problem reaches beyond the scope, use my compound bow troubleshooting guide. If nothing is broken and you are deciding what deserves money first, read which bow upgrades are worth buying.
Choose the Buying Path That Matches What You Own
1. Start With the Complete Axcel System
Best for: A hunter who needs the slider sight and modular scope housing.
This is the cleanest path when you do not already own the Landslyde. Inventory the included AVX-41 parts before adding a lens or shade.
2. Upgrade an AVX-41 You Already Own
Best for: Adding magnification or glare control without replacing the sight.
Check the hardware already in your housing, then compare the lens, spacer, retainer, and shade you actually need.
3. Put an ULTRAVIEW Scope on the Axcel
Best for: A hunter who wants the UV cartridge system and is willing to change the housing.
Use the current compatibility chart to select the correct scope rod before buying the rest of the build.
If your problem is focus rather than fit, compare the current Specialty Archery clarifiers and verifiers only after you know which image needs to be sharpened.
Bow Sight Scope FAQ
Do bowhunters need a scope lens?
No. A lens is useful only when it improves the sight picture without costing you speed, clarity, or low-light performance.
What lens power is best for bowhunting?
I use 4x because it gives me useful definition and still feels manageable in the woods. A new hunter may be better with no magnification or 2x. Your eye and shot process matter more than somebody else’s number.
Will an ULTRAVIEW scope fit an Axcel Landslyde?
It can with the correct scope rod and compatible UV housing. Use ULTRAVIEW’s current compatibility chart for the exact Axcel model instead of assuming one rod fits every Axcel sight.
Can I use an aftermarket lens or sunshade?
Yes, when the part is made for the exact scope and you verify the dimensions, seller, and return policy. My aftermarket AVX-41 lens and shade worked through a full season. I am more cautious with structural mounting hardware.
Do I need a clarifier with a 4x lens?
Maybe. If the target becomes blurry after adding magnification, test a compatible clarifier at full draw. Do not add one simply because another hunter uses it.
Do I need to re-zero after changing a scope part?
Yes. Recheck the zero after changing the housing, rod, pin, lens, peep, clarifier, verifier, or hardware that can affect alignment.
My Final Take
The best bow sight scope is not the one with the longest parts list. It is the one you can center, see, and trust when a deer steps into the opening.
My Landslyde, AVX-41, 4x lens, and aftermarket shade earned that trust through a full season. The lens gave me more definition. The shade controlled glare. The sight stayed where I put it. Most importantly, the setup stayed out of the way when it was time to shoot.
Build the system one decision at a time. Check compatibility, change one part, level it, zero it, and shoot it from real hunting positions. Then stop turning screws and learn to trust the sight picture you built.
Want to see exactly what I’m carrying this season? Check out my Personal Bowhunting Gear List for 2026